With small margins due to the competitive nature of the marketplace and a search algorithm that might not be as intuitive as Google’s, it can be difficult to figure out where to start with Amazon’s PPC advertising campaigns. A simple but effective strategy to start by using an Automatic Targeting ad campaign.
Auto Targeting is a great way to begin to collect information on what search terms are associated with your products or, more specifically, what search terms Amazon thinks should be associated with your product – essential information. A good way to look at it is as an investment in data for future campaigns – as well as a paid boost to a product’s sales rank.
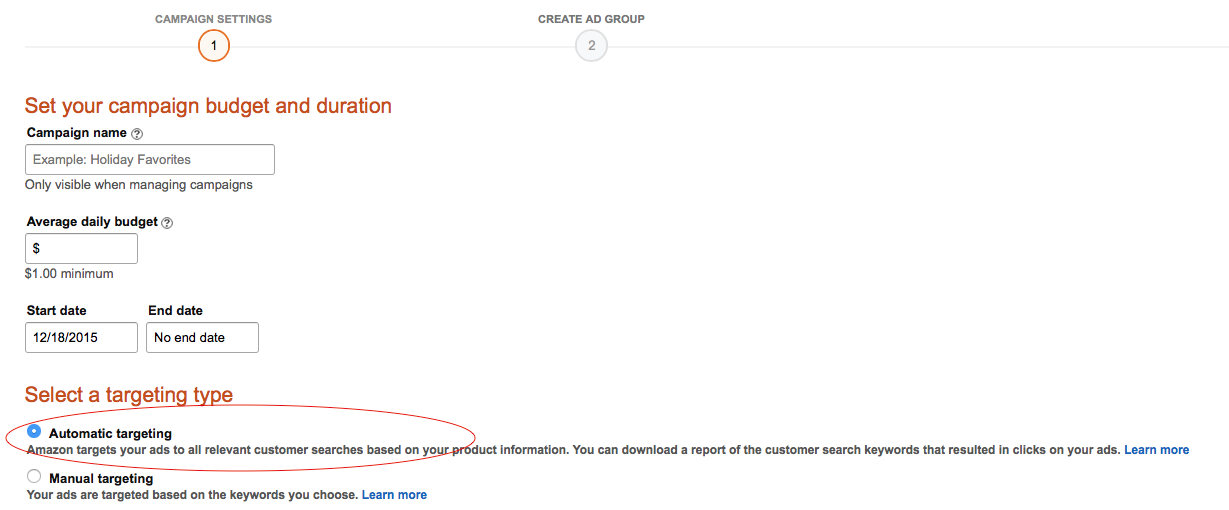
Setting up an auto targeting campaign is incredibly easy. Start by mapping out a daily budget that you can afford. Unless you’re under serious time pressure, it’s best to start with a low daily budget in your campaign settings and then increase it incrementally until you’re getting the amount of sales and/or data that you need.
The actual setup of a campaign is straightforward. If you have a Seller Central account you can begin here.
Note that auto targeting is chosen at campaign level as seen below:
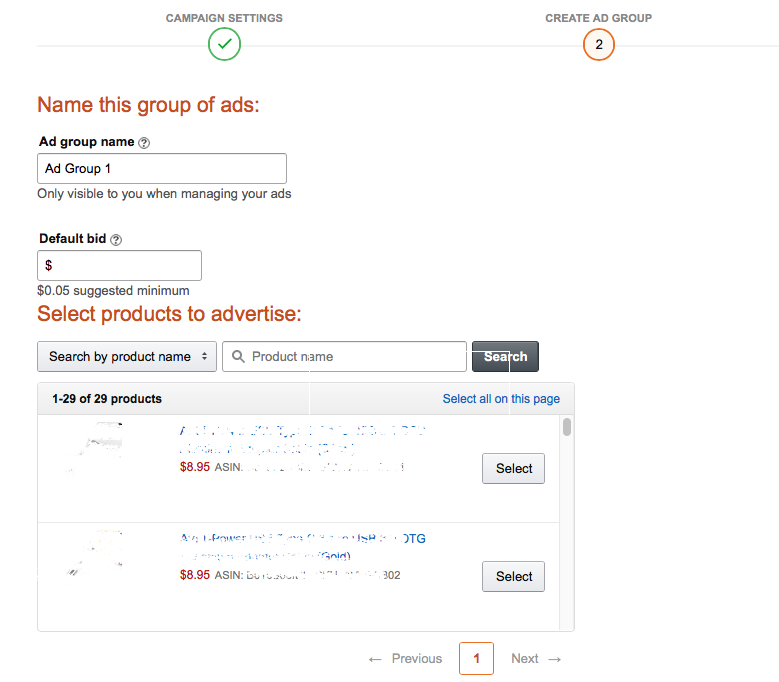
On the next page, it’s as simple as selecting the products you’d like within one adgroup. Be sure to set up individual ad groups for variations of a single product to get the most accurate data possible.
A quick not for anyone new to Pay Per Click Advertising, the Default Click field what you’ll pay when an Amazon user clicks on your product ad. Your costs consist only of clicks, not impressions (display of the ad)
Search Terms Report
As your campaign runs, you can view the number of impressions and clicks that your product is getting in the Campaign Manager of your Seller Central account. Once your campaign has been running for a couple of days, you can start to download more detailed information on search terms. You can get to this page either by clicking into your ad group and following the link (below) or going to Reports > Advertising Reports > Search Terms Report.
Ad Group Overview:

Search Terms Report Download:

Once you’ve downloaded this report you have some concrete information with which to start assessing your ad strategy. Not only do you have a list of the search terms that are actually being used by shoppers to help hone a manual keyword list, but you’ve also got an idea of how Amazon identifies your product which can be useful for improving the product detail page itself.
The Report itself includes:
- Search Terms
- Ad Impressions
- Ad Clicks
- Total Spend
- Avg. Cost Per Click
- Click thru Rate
- Product Sales
- Conversion Rate
- Cost per Sale
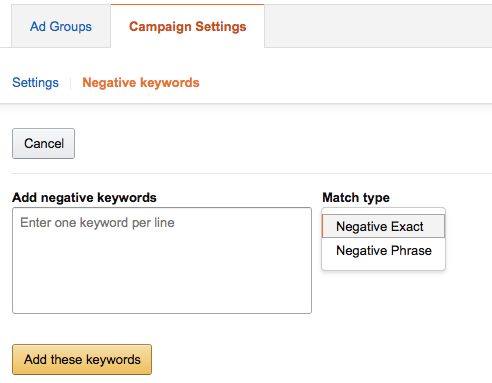
Negative Keywords:
Because we’re using the auto-targeting as an information gathering tool in this example, it’s best to let your campaign run until you have a significant amount of information (a “significant amount” will vary from product to product, and seller to seller). However, after running for a short period, you can begin to add negative keywords. In the beginning, you can identify the obvious mistaken keywords (“Chicago Bears” turns up for your Teddy Bear). As your campaign runs for a longer period, you can begin to get more serious about weeding out negative search terms and try to get a positive return from the auto targeting campaign (This is not always the best strategy, or even possible, but if it’s making you money it’s making you money).
Adding negative search terms is another simple process in Seller Central. After identifying search terms that don’t relate to your product with the search term report, you simply click into the auto ad campaign > campaign settings >negative keywords > add keywords. Note that Amazon has an Exact Match and Phrase Match option for negative keywords. Be sure to choose the correct match type – in most cases you’ll want to choose Exact Match to avoid losing relevant search terms.
Adding negative keywords on a regular basis is good practice if you’re trying to hone a keyword list but still want to collect Amazon Auto Campaign data or, of course, if you’re running an auto ad campaign with the expectation of a ROI.
Ultimately, Amazon’s auto-targeting campaigns have the potential to be profitable to sellers. However, they can also be a worthwhile investment in data for broader use in optimizing manual PPC campaigns and creating product detail pages that rank for the correct search terms.
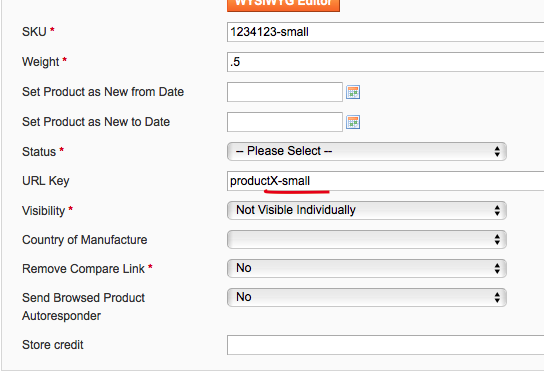
 When multiple products and variations are created with a single URL key, Magento will create a rewrite to direct links to what it thinks is the correct URL. After you’ve saved your product and it’s variations with unique URLs, you need to delete these rewrites.


