
Steps:
- Create Jabber Script
- Test from terminal
- Configure Zabbix to use Jabber script
- Create Email Script
- Test from terminal
- Configure Zabbix to use phpmailer script
- Tell Zabbix to notify
- Flap a server to verify operation
jabber.sh is a replacement for the built-in Jabber/XMPP functionality within Zabbix. You may need to install ‘sendxmpp’ prior to installation. This is functional in an Ubuntu Xenial server installation, but the path may vary for CentOS/RHEL deployments.
Contents of /usr/lib/zabbix/alertscripts/jabber.sh:
#!/bin/bash

to=$1

body=$2
cat < $2

EOF
Adjust ‘user’, ‘server’ and ‘password’ accordingly for your particular setup. The script should be owned by the zabbix user and have execute permissions set:
-rwxr-xr-x 1 zabbix root 288 Jun 16 05:11 jabber.sh
To test, simply execute the script like any other. Note the arguments passed into it:
# /usr/lib/zabbix/alertscripts/jabber.sh recipient@server message
If unable to send, try using sendxmpp outside the script and make sure it can send that way, then debug the script as required.
Your Zabbix should look like this:
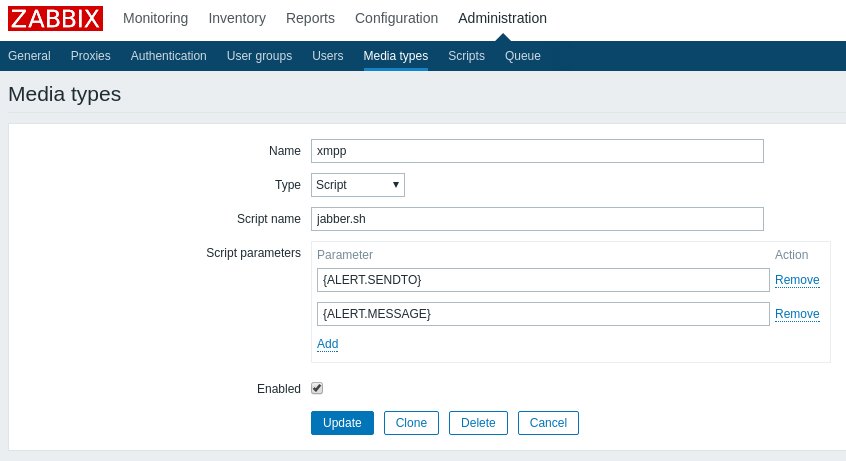
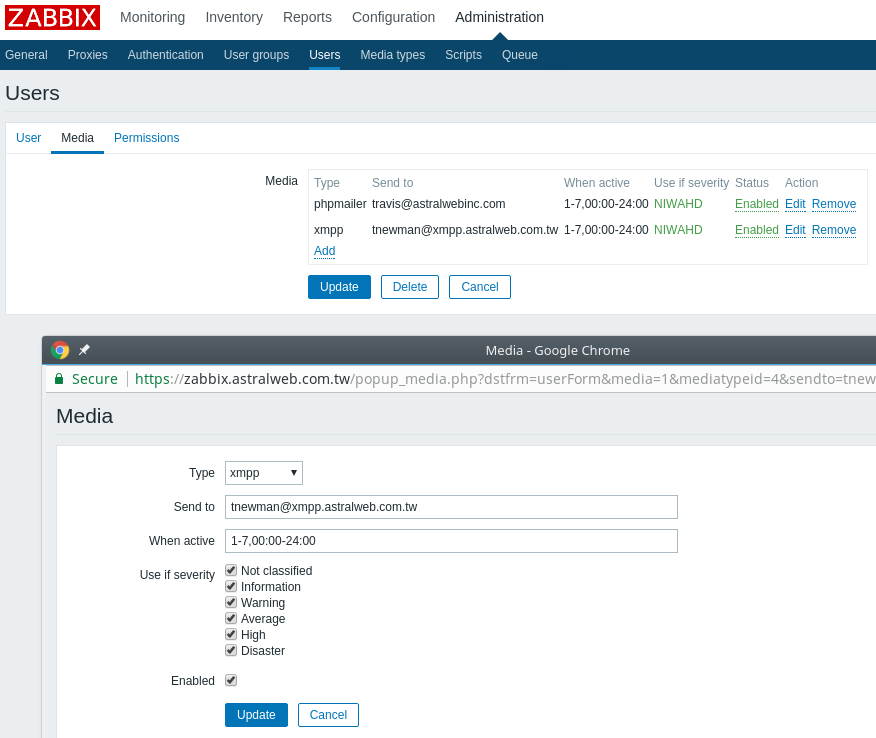
Note that the ‘Type’ of the media for the user corresponds to the name of the script we added earlier.
Email follows a similar procedure. Just make sure to have the necessary PHP modules installed. Below is the setup to use a gmail account:
Contents of /usr/lib/zabbix/alertscripts/phpmailer.php:
#!/usr/bin/php

 require_once "Mail.php";
$from = "ZABBIX <user@domain>";

$to = $argv[1];

$subject = $argv[2];

$body = $argv[3];
$host = "ssl://smtp.gmail.com";

$port = "465";

$username = "username";

$password = "password";
$headers = array ('From' => $from,

'To' => $to,

'Subject' => $subject);

$smtp = Mail::factory('smtp',

array ('host' => $host,

'port' => $port,

'auth' => true,

'username' => $username,

'password' => $password));
$mail = $smtp->send($to, $headers, $body);
?>
Adjust ‘user’, ‘server’ and ‘password’ accordingly for your particular setup. The script should be owned by the zabbix user and have execute permissions set:
-rwxr-xr-x 1 zabbix root 572 Jun 16 12:26 phpmailer.php
To test, simply execute the script like any other. Note the arguments passed into it:
# /usr/lib/zabbix/alertscripts/phpmailer.php [email protected] subject body
Make Zabbix look like this:
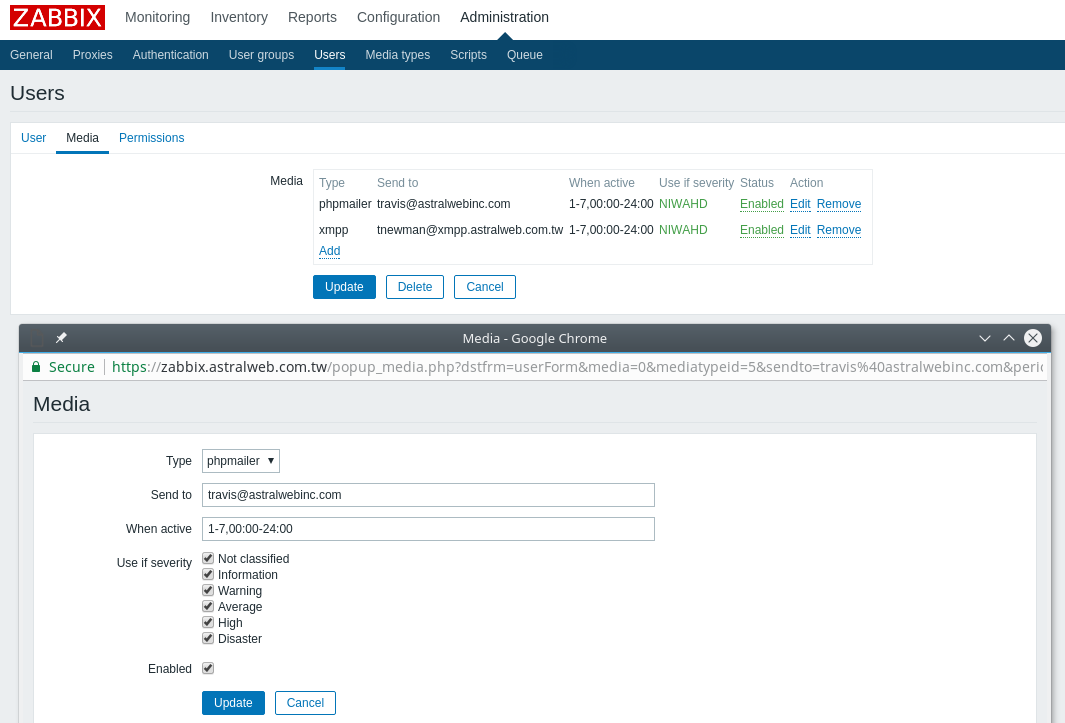
Note that the ‘Type’ of the media for the user corresponds to the name of the script we added earlier.
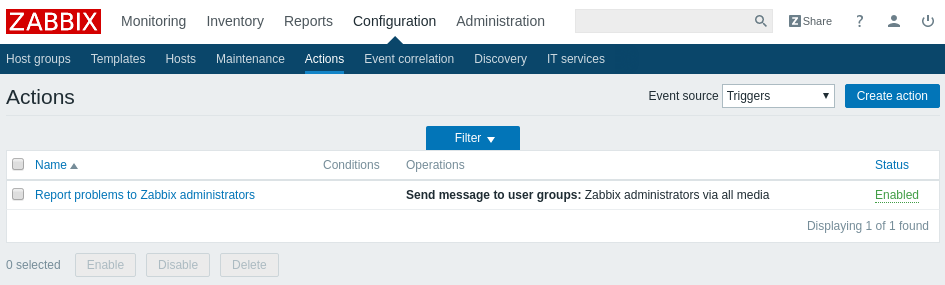
Most important step! This tells zabbix to actually use everything we just set up. Once this is enabled, flap a server to give zabbix something to tell you about. Check Pidgin and your email to see if it worked! 🙂


