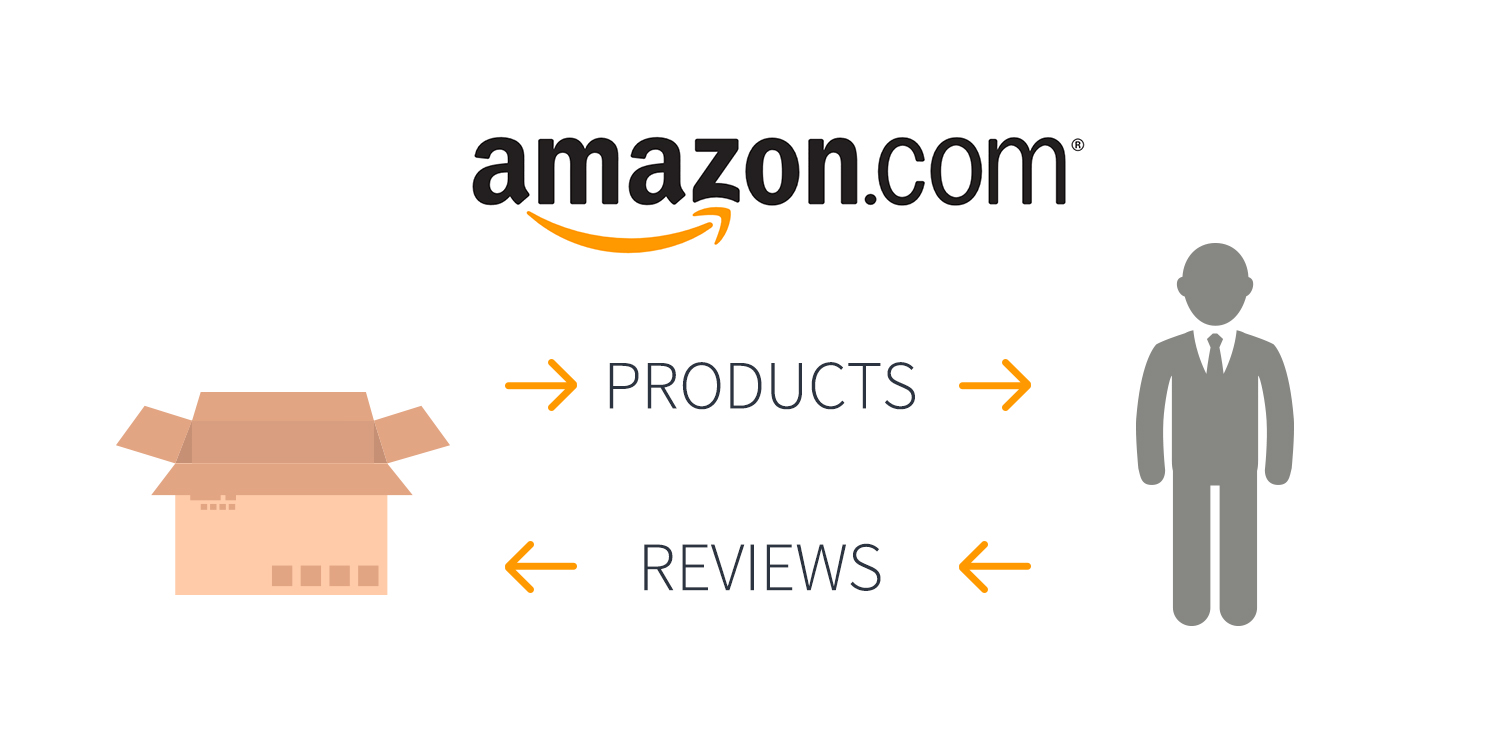
Many vendors on Amazon find themselves needing to provide a discount on one or more of their products to a specific person or group of people. A prime example of this would be when a vendor would like to offer a discounted or free product in exchange for increasing product exposure and getting reviews. Not only can using a promotion such as this allow you to increase your reviews but, those reviews will be “verified purchases.” As an added bonus, your products will likely receive a bump in sales which is always valuable, no matter how small.
Offering this discount is a pretty simple process with your Seller Central account. Below is a short step by step guide to creating a basic discount that you can share with a select group of customers:
Once logged into Seller Central, go to Advertising > Promotions:

On this page, you’ll select the “Money Off” option, which will take you to the promotion details page:
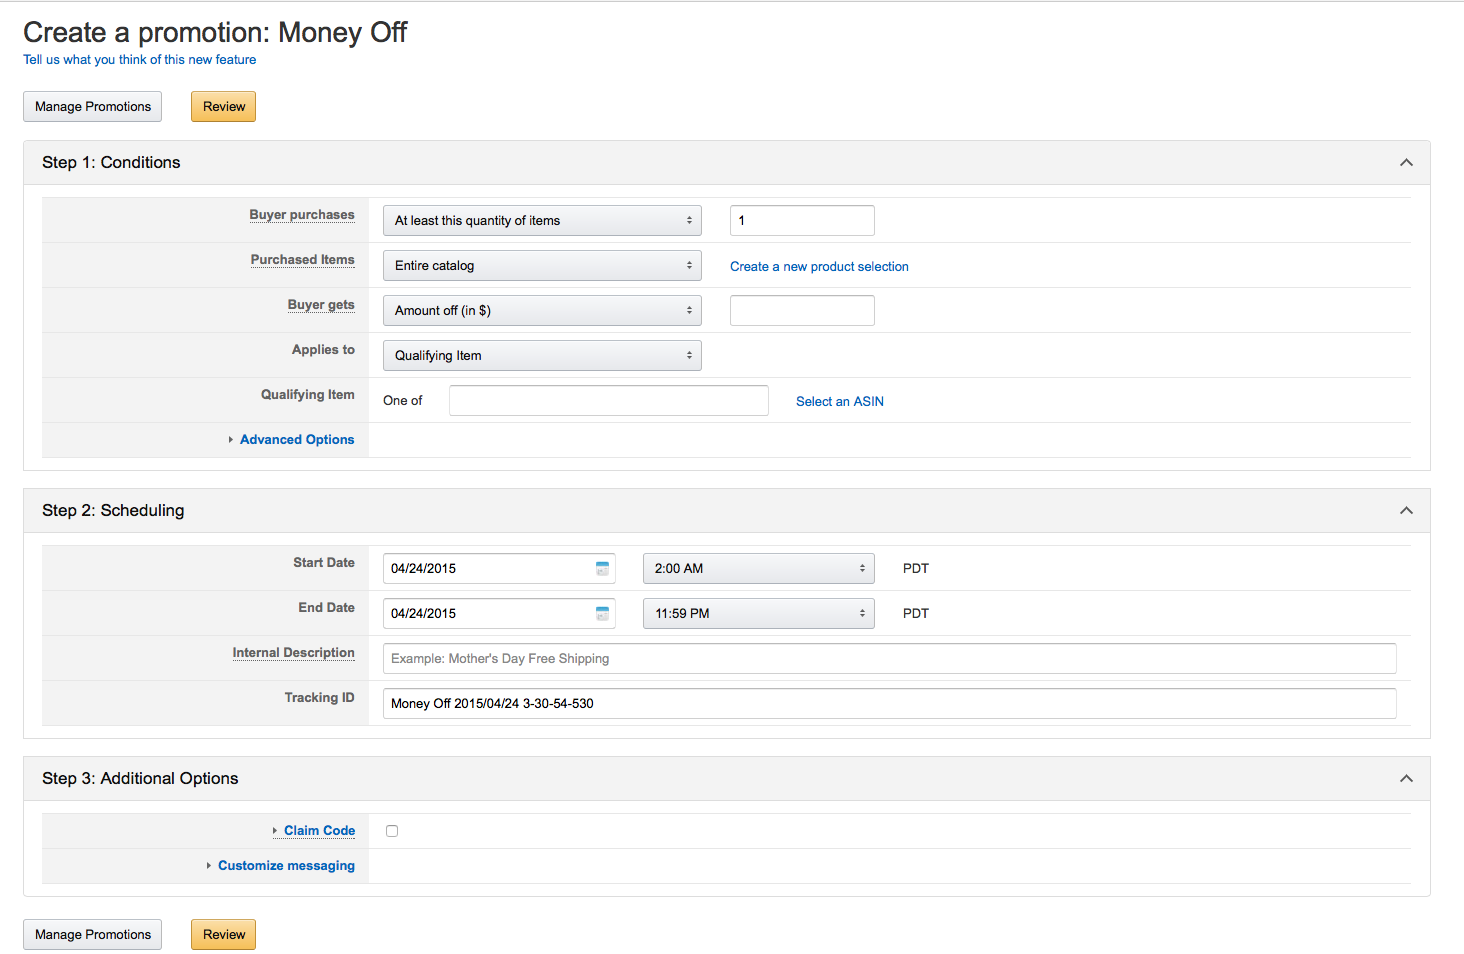
Most of these fields are pretty self explanatory. For this example lets say we want to offer one newly-released products for free.
Step 1: Conditions
- Buyer Purchases – in this case I will select “At least this quantity of items” and “1,” as I want the recipients of this promotion to receive it without buying multiple products.
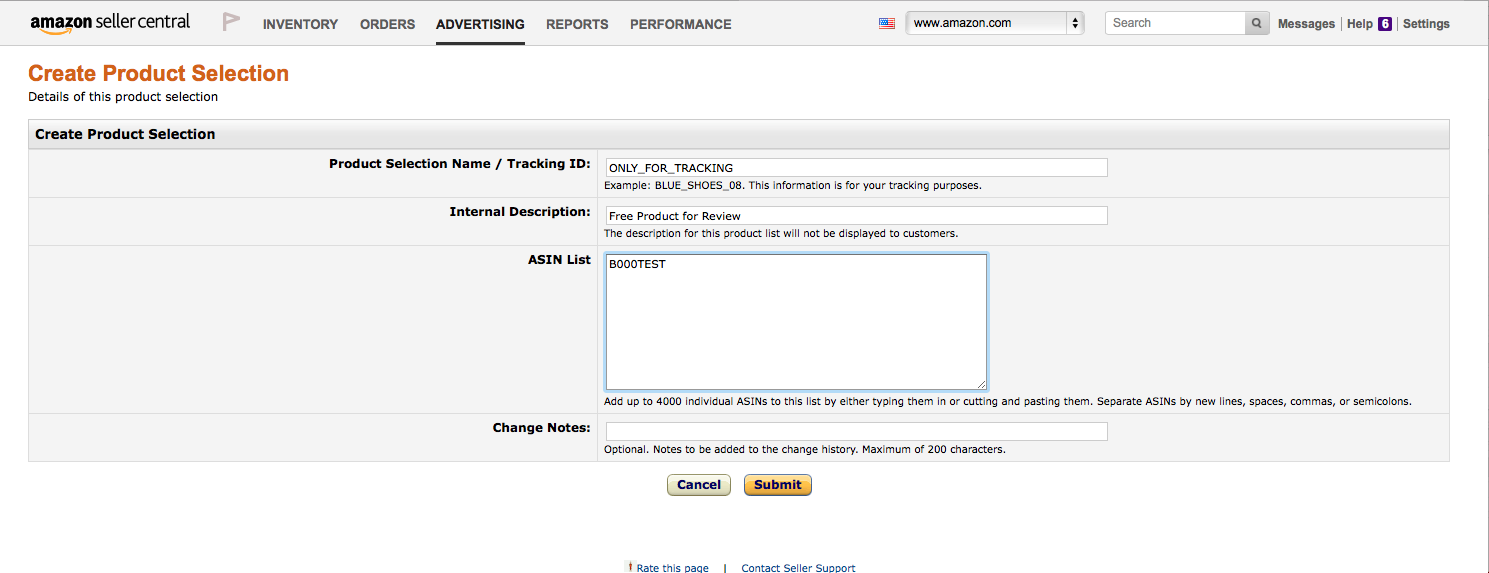
- Purchased Items – for our purposes I will create a product selection that includes only the product I want to offer. After clicking on the link “Create a new product selection” to the right of this field you’re able to create a selection based on SKU, ASIN, and more.
- If you add multiple items to your selection, based on these conditions, anyone purchasing any one of the items in your product selection will be eligible for the discount.
- Buyer gets – gives you the option to discount by either a percentage or fixed amount. The simplest way to offer a product for free is to simply select “Amount off (in$)” and input the full price of the product.
- Applies to – for our purposes we will select “purchased items,” meaning that it will apply to item(s) we set up in the purchased items field.
- Advanced Options – gives you the option to exclude subsets of your catalog, but is not relevant for our purposes of offering a promotion on one item.
Step 2: Scheduling:
This section is also very clear in terms of filling out conditions, offering you a time span with a start and end date and time.
- It’s a good idea to set the time span to a period that you know you’ll be able to easily monitor, particularly because Amazon requires that discounts be set up at least four hours in advance. You should plan ahead to be sure that you can check that the discount is active when it should be.
- Internal Description is solely for you. A simple description will do. i.e. “Product X Review Giveaway.”
- Tracking ID – Again this is for tracking purposes, and may not be very important unless you have large scale sales and promotions on Amazon. This field is automatically filled out by Amazon with a default ID.
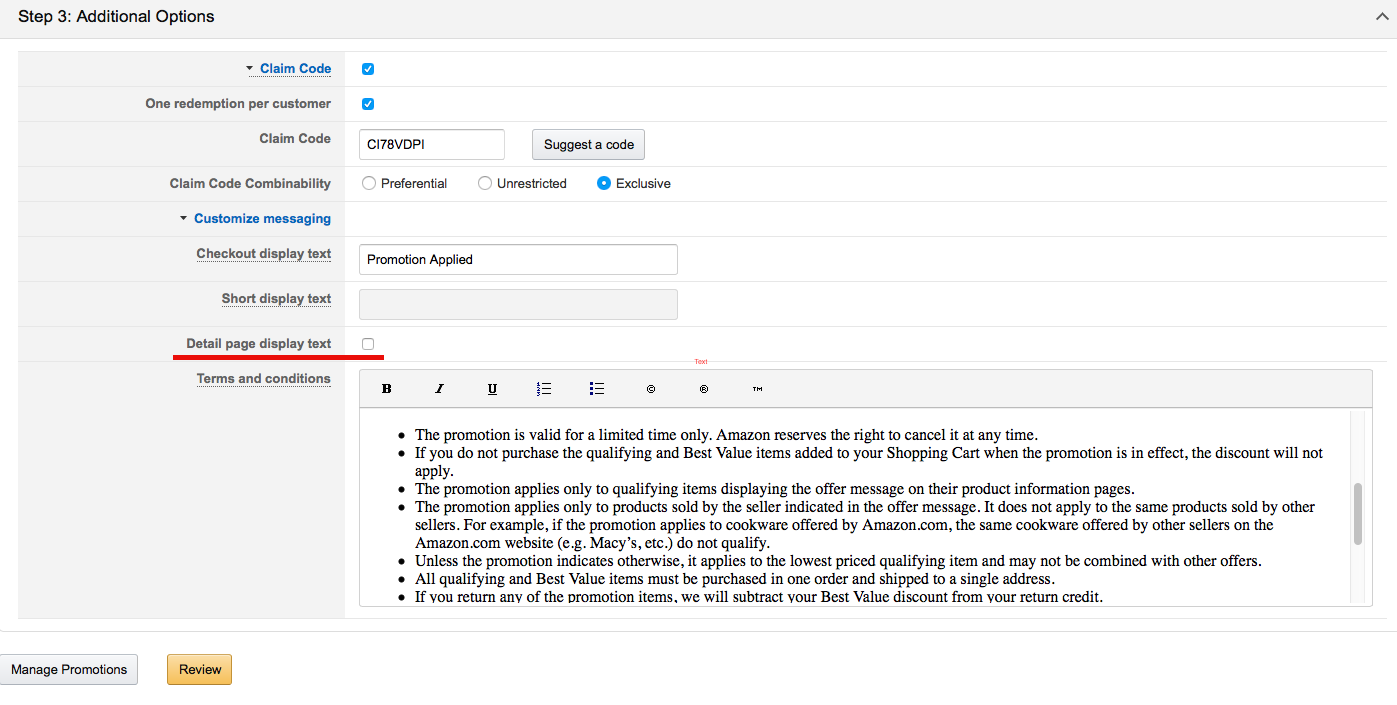
Step 3: Additional Options:
This is the section where you are able to confine the discount to only a select number of people that you’ve shared it with.
Click the checkbox next to Claim Code to see the following options:
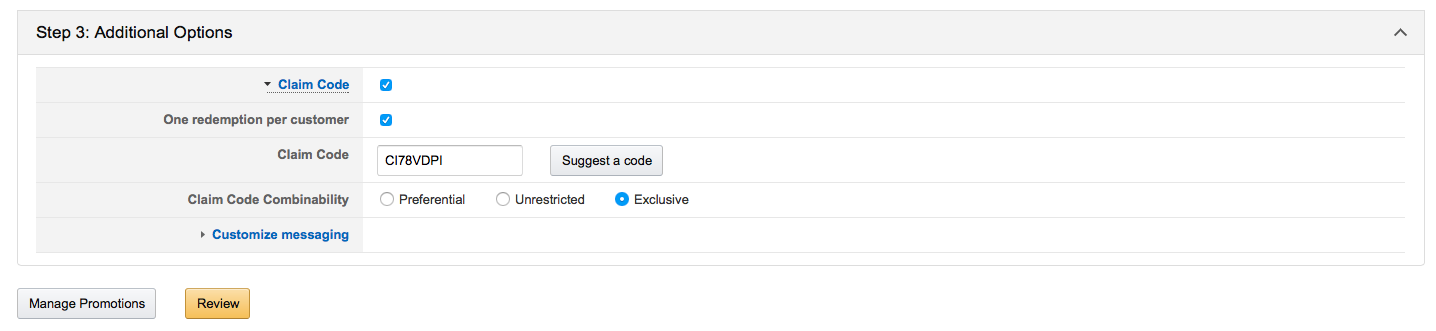
- One redemption per customer – be sure to select this checkbox to avoid giving one customer hundreds of free products.
- Claim Code – Amazon will give you a randomly generated. You will need to go to “Manage Claim Codes” to generate a specific number of one-time use codes (See step 4). Otherwise, if you choose to use this code, it will be restricted to one user but users will be able to make the code public.
- Claim Code Combinability – in this case we will select “exclusive,” due to the fact that we are offering a free product. This is generally a safe selection unless you have multiple promotions running which you want to combine in custom ways.
- Customize messaging – This field can generally be left in the default format. However, be sure to UNCHECK Detail page display text if you do not want anyone who views your product to take advantage of the discount.
After reviewing and submitting, you’ve set up a promotion with a private claim code. As stated before, particularly with the delay in Amazon’s system, be sure to test your promotion when it is set to go into effect – both to make sure that it works in the checkout process and that you’ve set it up correctly and is not appearing publicly.
Step 4: Exclusive Claim Codes
At this point you can create a specific number of claim codes that can only be used once, rather than being restricted only by one use per user.
Click the tab Promotions > Manage Your Promotions and select the promotion you’ve just created (be sure to check “pending” promotions).
Once you’re viewing the desired promotion, click on Manage Claim Codes. Here you have the opportunity to Generate Claim Codes which you can download from Amazon to provide to reviewers or other customers. As long as you’ve followed the proper steps when setting up your promotion, this will allow you to rest easy knowing that your codes are truly exclusive.
Good luck!


