How to run Analytics Experiments (A/B Testing) on WordPress

In our daily marketing scramble, we many times forget the importance of conversions and conversion rate and only focus on gaining new customerss. Due to this fact, we have setup in our own company a policy of always running tests on our clients’ websites.

a-b-testing-experiments

We have included below a simple step by step guide on how to setup A/B testing using WordPress and Google Analytics Experiments.

Step 1 – Business Goals

a. Think about what are your core conversions are (purchase of product, form filled out, newsletter joined, commented on blog, etc)

b. Define a goal in Analytics
If you have not defined a goal in analytics, see our analytics goals article

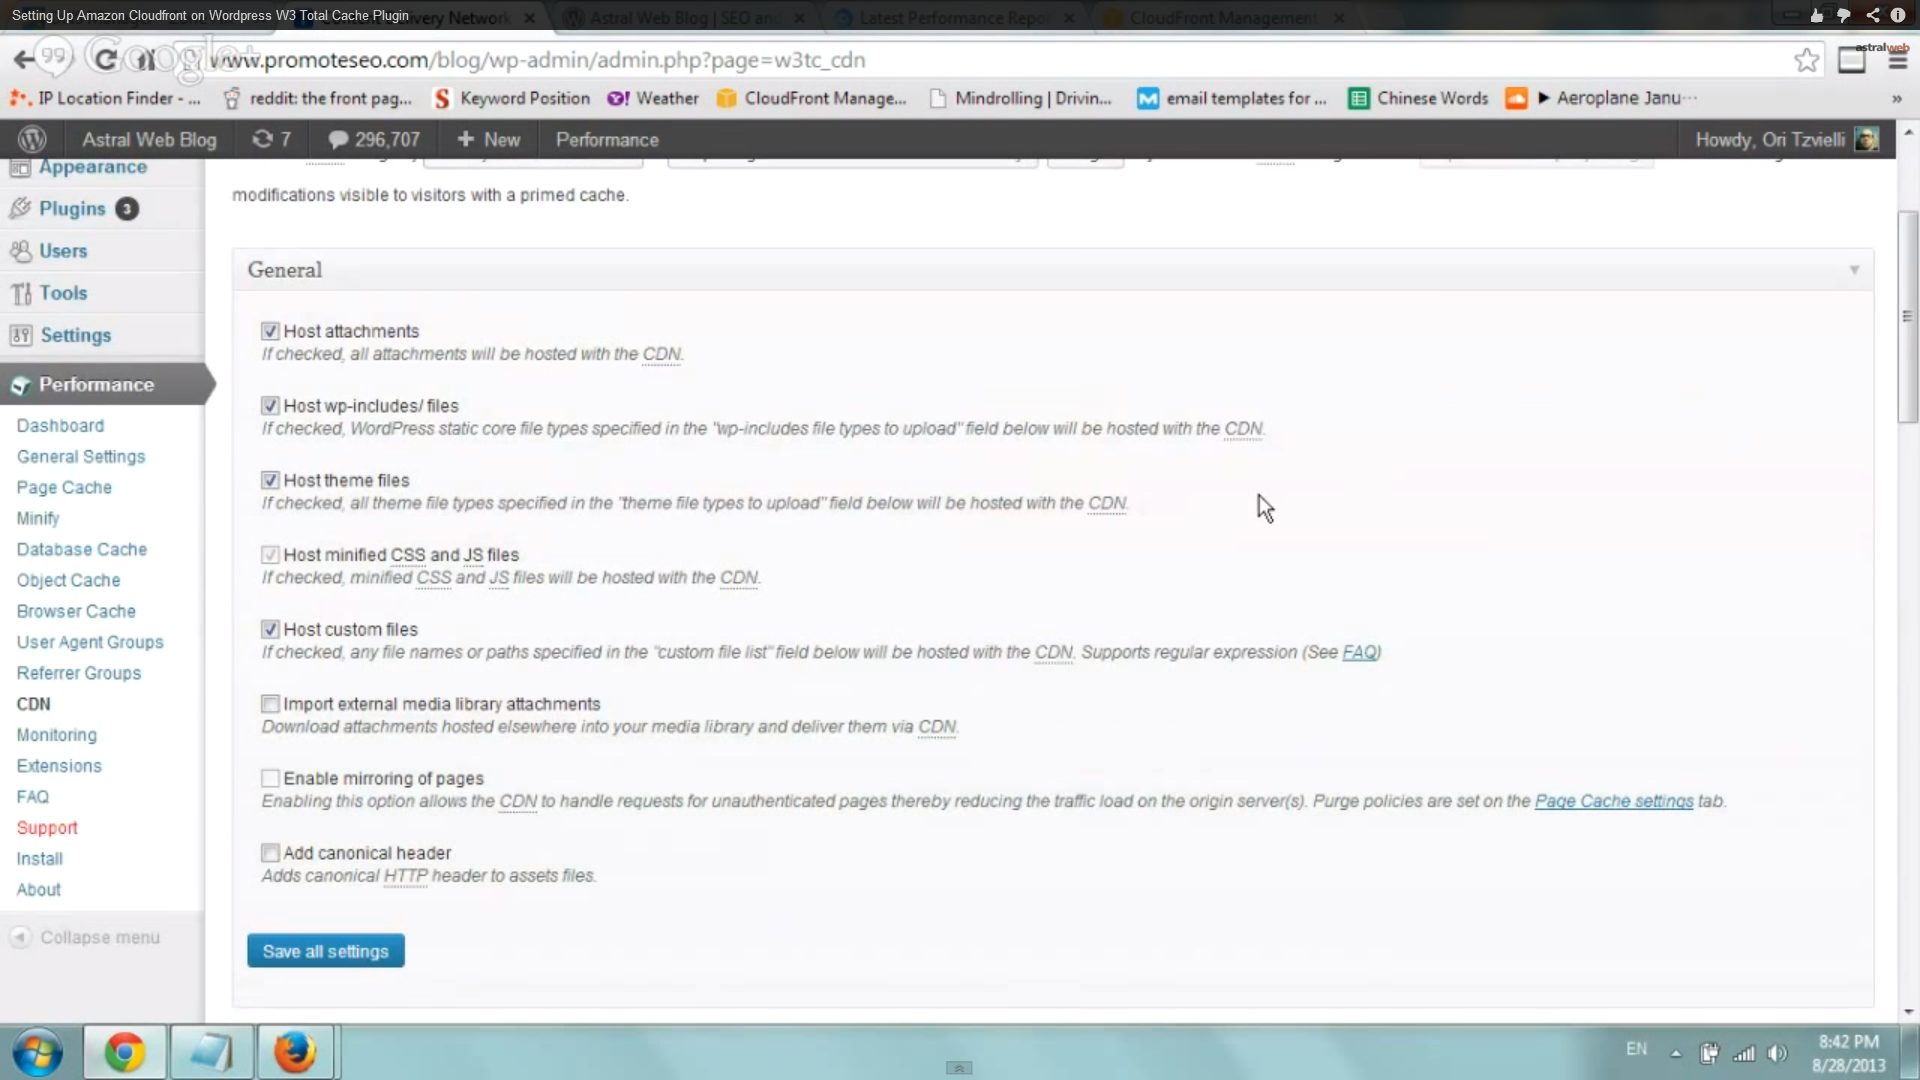
Step 2 – Define Experiment

Create variation page in wordpress by visiting the “Pages” -> Add New. Create your new variation page with the specific element you want to test and publish. Try not to test out too many changes on your pages.

add-new-page

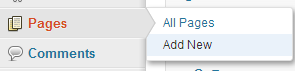
* don’t forget to note the live url for later.

url-of-page

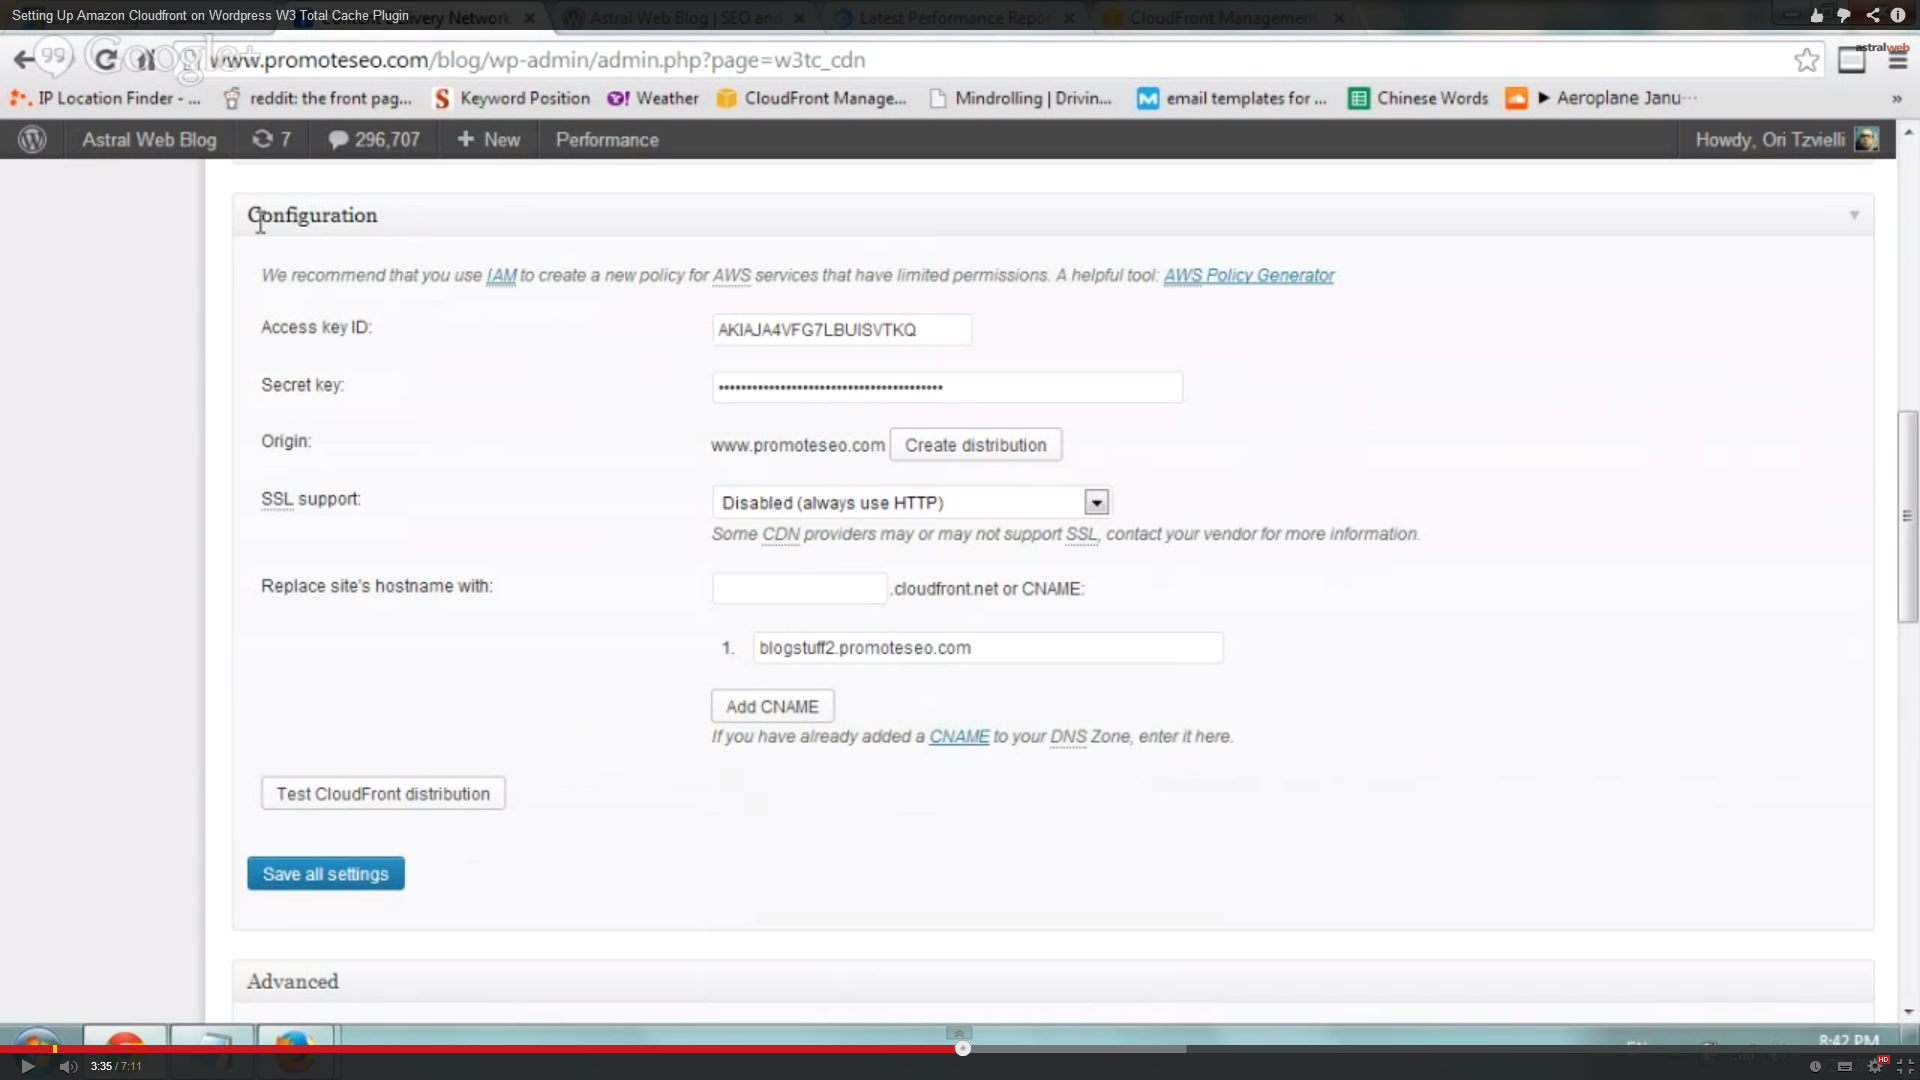
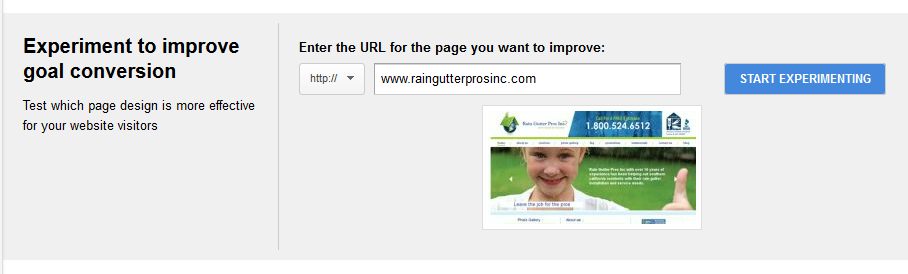
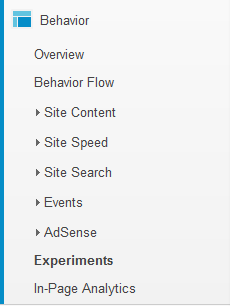
Step 3 – Setup Experiment in Analytics

Visit the Behavior -> Experiments page:

behavoir-experiments

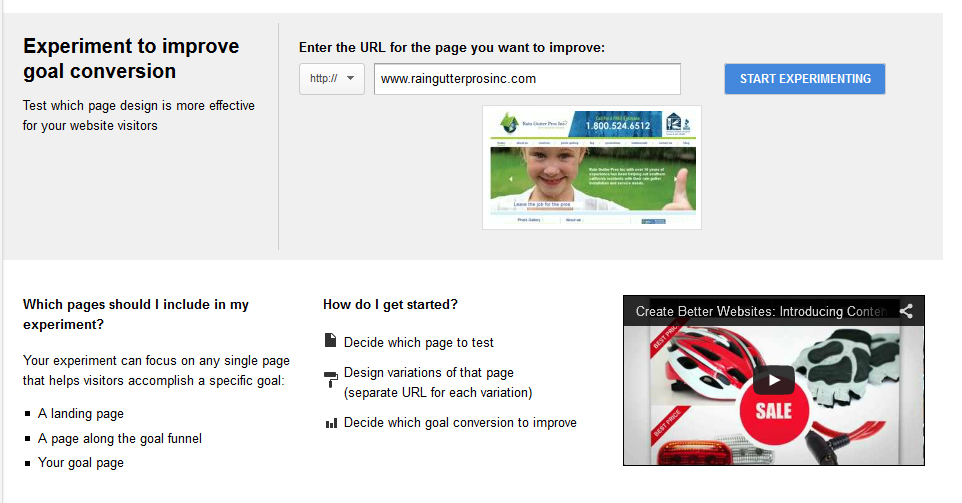
a. Enter original page you want to test against (and click on start experiment)

start-experiment

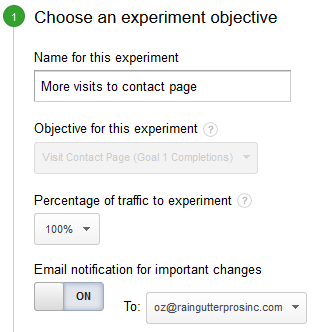
b. Setup settings for Experiment

– name
– objective
– % of traffic to experiment on
– email notifications

step1-experiments

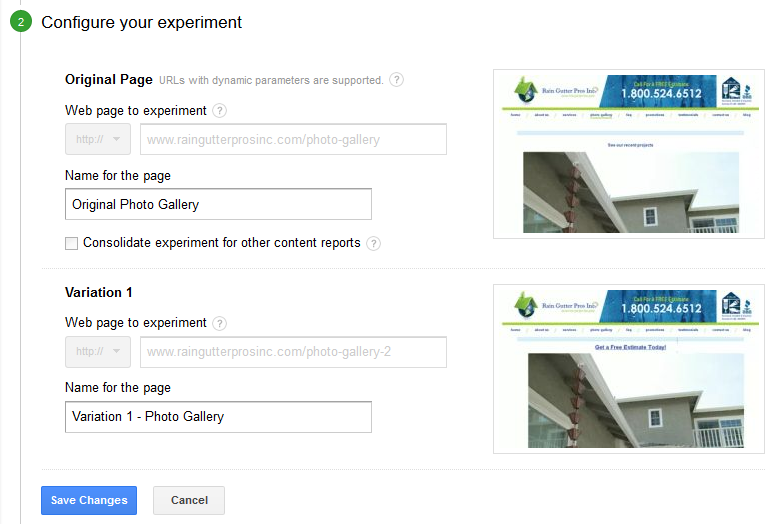
c. Enter URL of Variation Page

* you can add more than one variation if desired
* check previews to make sure you are defining the correct pages

step2-experiments

d. Add code to site pages

step3-experiments

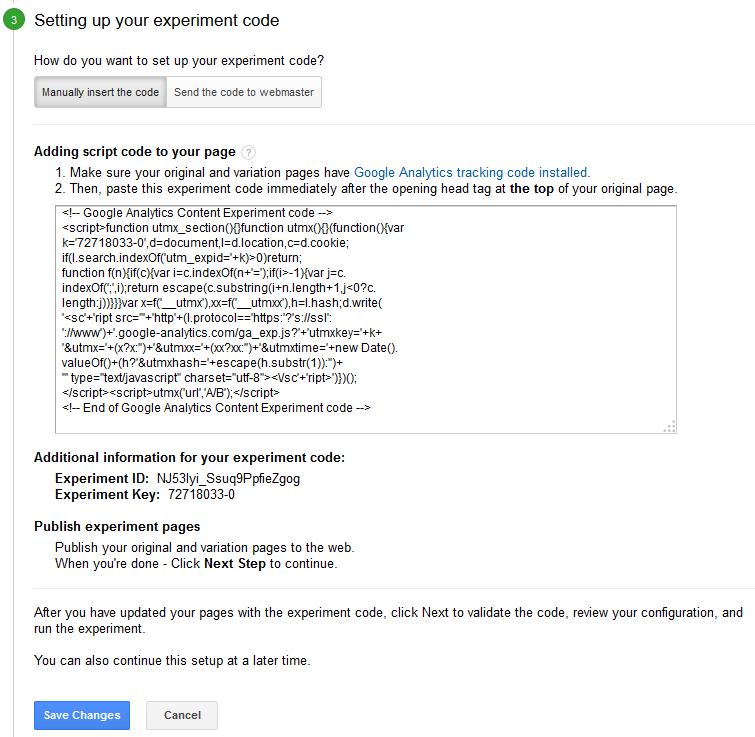
You will need to add the correct analytics code to begin your experiment. Follow the instructions below to proceed:

1. all pages must have analytics tracking code
2. the original page has to include additional code

Use the following format:

<?php if (is_page('') ):?>

<?php endif; ?>

Find the original page. edit the page in wordpress and look at url
“post=x” -> take the number and add to our code:


<?php if (is_page('x') ):?>

<?php endif; ?>

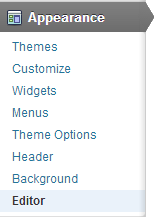
b. go to appearance -> editor -> header.php and paste the code with analytics
extra code right after the <head> tag and click on “update file”.

wordpress appearance editor


<?php if (is_page('') ):?>
xxxxxxxxxxxxxxx
xxxxxxxxxxxxxxx
xxxxxxxxxxxxxxx
<?php endif; ?>

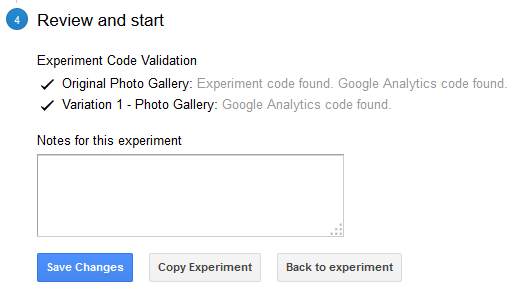
Step 4 – Complete and set experiment live

Verify that you have two check marks underneath “Experiment Code Validation” and click on “start experiment”

step4-experiments

That’s it! Let us know if you have any questions with A/B testing. We’ll be happy to answer your questions.

Setup Up Amazon Cloudfront CDN on WordPress W3 Total Cache Plugin

Site Speed is one of the most overlooked aspects of a website (at least in my opinion). There have been many research articles about user abandonment due to slow site speed (for example). If possible try to have your website load in less than 2 seconds.

We take this seriously with our clients and love speeding up websites (i personally don’t like racing cars so websites are good for me)

Let’s begin:

Step 1: Install W3 Total Cache Plugin

Login to WordPress and Visit the “Plugins” tab and click on “Add New”. Search for W3 Total Cache Plugin and Install

Install WordPress Plugin

Search for W3 Total Cache

Install W3 Total Cache for Wordpres

Step 2: Sign up for Amazon Cloudfront CDN

If you haven’t done so already, please sign up for Cloudfront at aws.amazon.com. You will need to sign up, enter billing information and proceed to next step.

Sign up to aws.amazon.com

Step 3: Go to Settings and Setup Cloudfront Distribution and W3 Total Cache

In WordPress go to:

Plugins -> Add New -> Install W3 Total Cache Plugin

Scroll down to the CDN box and enter information

CDN -> Enabled

CDN Type -> Amazon Cloudfront

Click on “Save”

Set as CDN Amazon Cloudfront

On Left “Performance” Tab, Click on “CDN”

Go to CDN Tab

Select all desired checkboxes to select what you want to store on CDN

Checkbox Desired CDN Settings

Scroll down to configuration and make sure you have the access key and secret key. You will be able to get access key from https://console.aws.amazon.com/iam/home?#security_credential

Next, you will want to Click on “Create distribution (+ wait 10 minutes)

Click on “test” and save

Tip: You may want to add a CNAME in your dns to keep the CDN references on your subdomain. Great for cleaner URLS and ease of changing CDN’s in the future (see end of video on bottom of this article for CNAME details)

Configure CDN

Step 4: Test Site and Speed

You of course will want to test that the CDN works and site functions correctly and quicker. First visit your domain and check that the site loads correctly and Second, see end of below video for details on how to test specific load speed via gtmetrix.com

Please let us know if you have any questions. We’ll be happy to help!

Contact Form 7 WP – How to Add Event Tracking on New Universal Google Analytics

After searching for about 20 minutes, i could not find any hooks to explain how to track events in analytics for a wordpress site we are using (contact form 7). All you have to do is: 1. Make sure you have the latest google universal analytics code google-analytics-new-code 2. Go to Contact Tab in wordpress Admin contact-tab-form-7 3. Edit your form and scroll to bottom to “Additional Settings” additional-settings Enter the following: on_sent_ok: "ga('send', 'event', 'Contact Form', 'sent');"

Someone Hacked our Blog – WordPress Conditional Hack GoogleBot

Symptoms We Had (WordPress Version 3.3.2):
Part 1. Google Results started showing our blog post meta description in french???

Part 2. Then we started seeing “This site may be compromised.”

Part 3. We posted on Google Forums and a nice person named Lysis responded – You have a wordpress conditional hack. Look at your site in Web-sniffer.net. Use the Googlebot user agent option, and you can see the content being added to the page.

And we found this suspicious code in our header.php file.

Part 4. We deleted the line of code in the header.php file and deleted the folder dodo

Common Guys. Can’t you stop with your BS

UPDATE #2 – Don’t forget to change permissions on your theme files to uninclude “write” so it doesn’t happen again.

Hope this helps!