For merchants, adding very uniques properties or characteristics to their stores will allow them to stand up in front of the competition, and luckily for them, Magento allows a high customization level out of the box; but still, some projects might require very specific customizations that are not 100% customized in the admin panel, such as for example: requesting to purchase a minimum quantity of a particular product before checking, changing the checkout flow when a product doesn’t meet specific criteria or conditions, enabling/disabling the product on frontend after some custom attribute previously defined, etc; and for these customizations, we usually require to extend the product form.
In Magento, adding new fields to the product form is one of the most powerful features of its framework, the development flow is quite simple; the official documentation provides many examples; however, it lacks a proper explanation of the elements involved in the whole process; for this reason, the purpose of this document is to ease a little bit the understanding of this customization task.
Let’s assume that a merchant requires to add a new text input into the product form, allowing the store to set a minimum amount of one single product in the cart before letting customers checkout.
Usually what you would do as a developer is to programmatically create a new product attribute and assign it to one or more attribute sets, or instead, manually create a new attribute in the administrator backend and assign it to any attribute set that fits the project’s requirement.
By doing any of the methods described above the new field will be displayed, saved, and loaded out of the box anytime a product form is used, very conveniently; however, there are a couple of limitations that would require us to add the field programmatically:
- The attribute sets will vary over time and when creating/editing a new attribute set, the administrator might forget to add the new attribute into the new set.
- The merchant might require to display the new field in only the products that meet specific conditions, something that clearly cannot be achieved out of the box at the moment of writing this article.
When adding a new field programmatically, in the most basic form, it will require extending the original product_form.xml and including the following components:
- Form: The basic form declaration.
- Fieldset: A component-like header that is able to collapse and contains as many fields as possible.
- Field: The actual input.
The most basic xml structure will look something like this:
<form>
<fieldset>
<field>
</field>
….
<field>
</field>
</fieldset>
</form>
Going back to our example, let’s go step by step more deeply into how to extend the product_form.xml.
First of all, we need to create a product_form.xml file in the module, inside the path CompanyName/ModuleName/view/adminhtml/ui_component/ and keep following the basic structure with some extra configuration data
<form xmlns:xsi=”http://www.w3.org/2001/XMLSchema-instance” xsi:noNamespaceSchemaLocation=”urn:magento:module:Magento_Ui:etc/ui_configuration.xsd”>
…
</form>
There is nothing mysterious about the code above, we are just adding the necessary configuration for Magento to recognize our new form elements, something very similar needs to be done with the fieldset:
<fieldset name=”amounts”>
…
</fieldset>
The name attribute will allow us the identify the fieldset programmatically, and must be unique among all of the components in the form. Furthermore, the fieldset will also require an extra child named argument for defining specific configuration for the fieldset:
<argument name=”data” xsi:type=”array”>
<item name=”config” xsi:type=”array”>
<item name=”label” xsi:type=”string”>
Min. Amount of Products
</item>
<item name=”collapsible” xsi:type=”boolean”>true</item>
<item name=”dataScope” xsi:type=”string”>data.amounts</item>
<item name=”sortOrder” xsi:type=”number”>10</item>
</item>
</argument>
Most of the lines can be copied and pasted, but need to pay attention to the following ones inside the config array:
- label: This is very self-explanatory, it is what the administrator will see on the UI.
- dataScope: This is how the data will be accessible inside the form array when need to save and retrieve the data, and it is very important to follow the convention ‘data.index’, otherwise the data would be inaccessible; in this case, our index inside the form array will be ‘amounts’.
Following our basic structure the field element would look like this:
<field name=”qty”>
…
</field>
Just as the fieldset element, the name attribute will allow us the identify the field programmatically, and must be unique among all of the components in the form. Also, the field will also require an extra child named argument for defining the specific configuration for it:
<argument name=”data” xsi:type=”array”>
<item name=”config” xsi:type=”array”>
<item name=”label” xsi:type=”string” translate=”true”>
Product Qty
</item>
<item name=”dataScope” xsi:type=”string”>qty</item>
<item name=”sortOrder” xsi:type=”number”>500</item>
<item name=”componentType” xsi:type=”string”>field</item>
<item name=”dataType” xsi:type=”string”>text</item>
<item name=”formElement” xsi:type=”string”>input</item>
<item name=”additionalClasses” xsi:type=”string”>qty</item>
</item>
</argument>
Most of the lines above are critical for our text input definition, but need to pay attention to the following ones:
- label: This is very self-explanatory, it is what the administrator will see on the UI.
- dataScope: This is how the data will be accessible inside the form array when need to save and retrieve the data; in this case, our index inside the form array will be ‘qty’.
- componentType: in our case, it needs to be a field.
- dataType: The datatype that will be used in our text input; in this string is just fine, we can cast to string or int if needed, this will avoid conversion issues between our Magento application and the database.
- formElement: input type.
- adiddionatinalClasses: Any additional CSS class that will be required in order to modify the UI of the component, in this case, we are using a CSS class named ‘qty’.
By following all these steps our complete form should look like this:
<form xmlns:xsi=”http://www.w3.org/2001/XMLSchema-instance” xsi:noNamespaceSchemaLocation=”urn:magento:module:Magento_Ui:etc/ui_configuration.xsd”>
<fieldset name=”amounts”>
<argument name=”data” xsi:type=”array”>
<item name=”config” xsi:type=”array”>
<item name=”label” xsi:type=”string”>Min. Amount of Products</item>
<item name=”collapsible” xsi:type=”boolean”>true</item>
<item name=”dataScope” xsi:type=”string”>data.amounts</item>
<item name=”sortOrder” xsi:type=”number”>10</item>
</item>
</argument>
<field name=”qty”>
<argument name=”data” xsi:type=”array”>
<item name=”config” xsi:type=”array”>
<item name=”label” xsi:type=”string” translate=”true”>Product Qty</item>
<item name=”dataScope” xsi:type=”string”>qty</item>
<item name=”sortOrder” xsi:type=”number”>500</item>
<item name=”componentType” xsi:type=”string”>field</item>
<item name=”dataType” xsi:type=”string”>text</item>
<item name=”formElement” xsi:type=”string”>input</item>
<item name=”additionalClasses” xsi:type=”string”>qty</item>
</item>
</argument>
</field>
</fieldset>
</form>
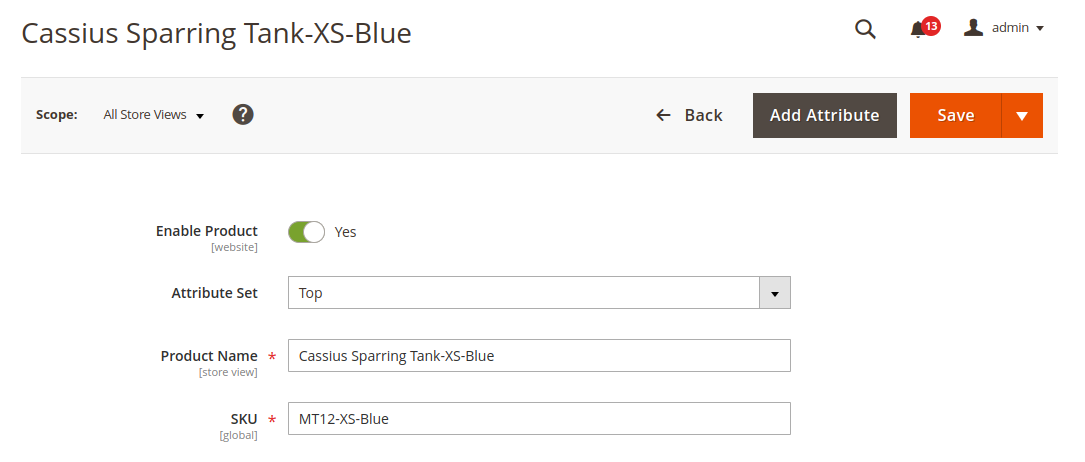
And finally, if you open any product form in the admin backend you will find a new title “Min. Amount of Products”, including a new text input “Product Qty”.

The next article will explain the steps for loading the data back any time the administrator is saving or opening a form, but understanding the basics concepts explained in this article is the key to truly having a good perception and enhancing full control of the product form.


