This article is a part of Astral Web’s Comprehensive Guide to JIRA!

Previously: Before You Start Using Atlassian JIRA Part 2: Create A Master Workflow For Your Business
Overview
If your business process is documented, you are ready to convert them into a JIRA process.
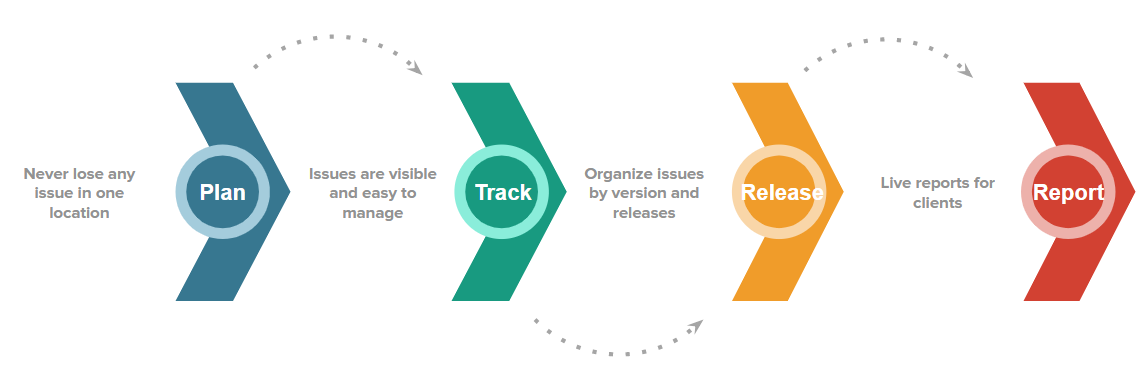
We chose JIRA Cloud because it has great features for agile development teams. The Kanban method provided in JIRA Cloud was our best choice to visualize our tasks and process them. We’ll show you these examples when we set up JIRA.
Understand JIRA Workflow Concept
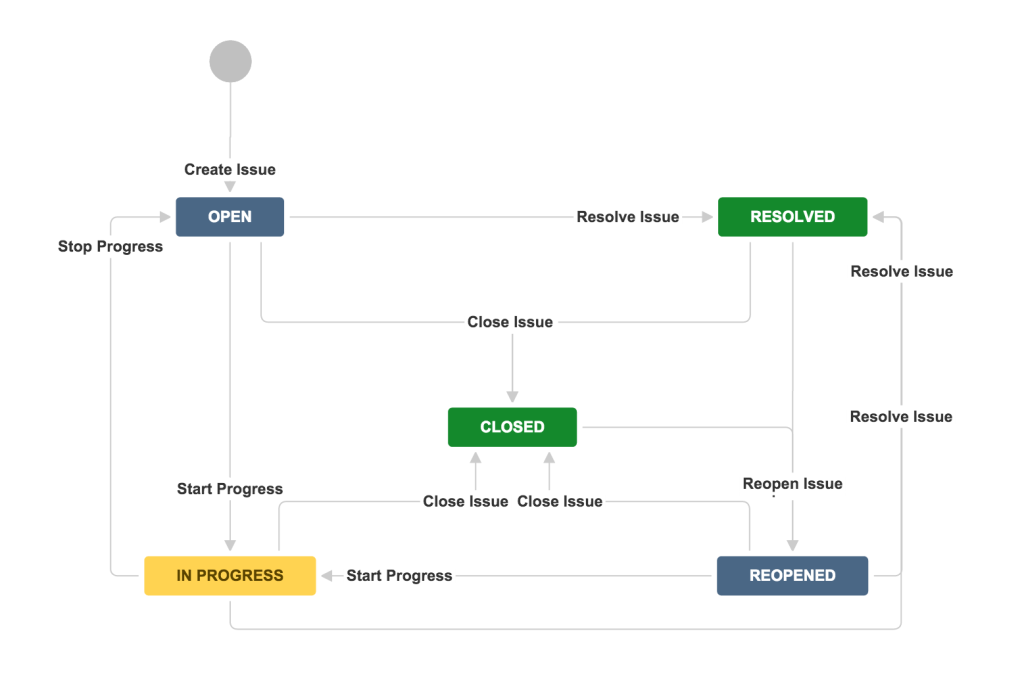
(source: atlassian.com)
As Atlassian describes: “A JIRA workflow is a set of statuses and transitions that an issue moves through during its lifecycle and typically represents processes within your organization.”
It is the logical process to move your issues to different states so you always know the status of an issue by just looking at the status information. Statuses cannot be vague, so make sure you can clearly describe steps in your business process to be able to create them in JIRA.
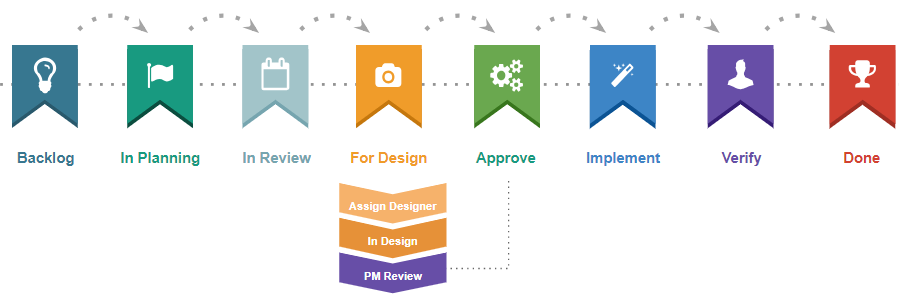
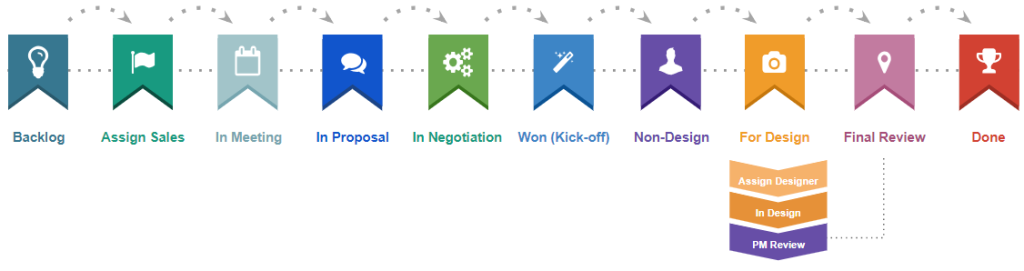
Astral Web Master Workflow
As we described in our “Understand your business workflow” article, after spending nearly 3 months to review of how our teams and team members work, we were able to put together a master workflow that is compatible for even our biggest projects.

- Backlog: A list for all pre-planning issues (ideas, to-do, etc.)
- Selected for Planning: Issues that are ready for planning and need to be assigned
- In Planning: Issues that are in planning
- In Review: Plans that need approval
- Selected for Development: Issues that need to be assigned to development team
- Selected for Design: Issues that need to be assigned to design team
- PM Review: Issues that need to be checked by PM
- Select for QA: Issues that need to be assigned to QA team
- Deploy: Issues that need to be deployed (website)
- Pending Approval: Issues that have been deployed and need 3rd party approval
- Done: Issue has been approved and completed
These are all the checkpoints for project managers to keep our solution quality high, regardless of what kind of task or project we need to complete.
However, this workflow is overkill for simple and general tasks. So, we also made sure transitions are flexible for different teams and project sizes.
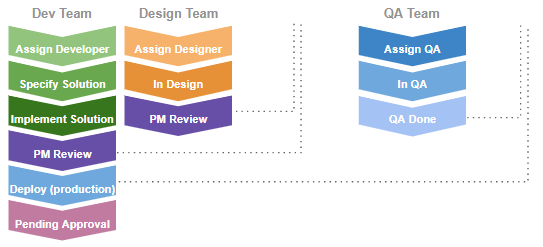
Customize workflow for each team
Development, design, and QA team branches off from the master workflow to process issues in their internal teams. Project managers are focused and handing off issues and receiving them for final review, so we omit detailed development, design, and QA tasks.
For smaller projects and teams, we simplified the master workflow with less steps and completely omit the development process. We kept the handover to the design team process, since many of our projects require design elements. This process is good for our marketing team, corporate strategy team, and other general work.
However, our sales team use completely different sales and crm system, so we took the general team workflow and added a few more status to customize a new process. We still borrow statuses from the master workflow when we can.
Prepare for naming transitions
You will need to set up a logical transition between each status. For example, if you are moving an issue status from “In Planning” to “Review”, you can name the transition “Review plan with PM”.
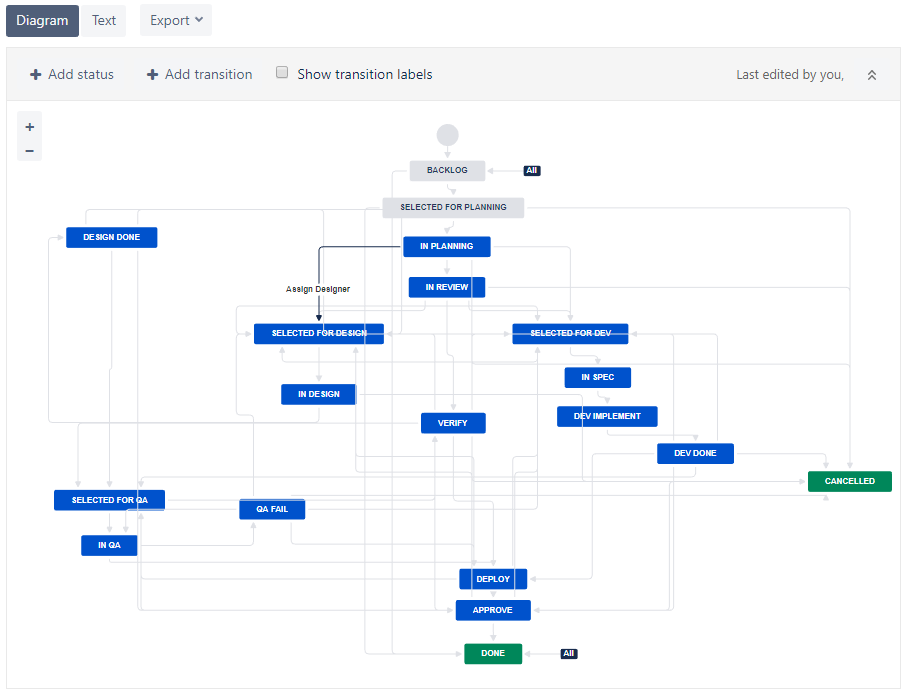
Create multiple workflows using status from your master workflow
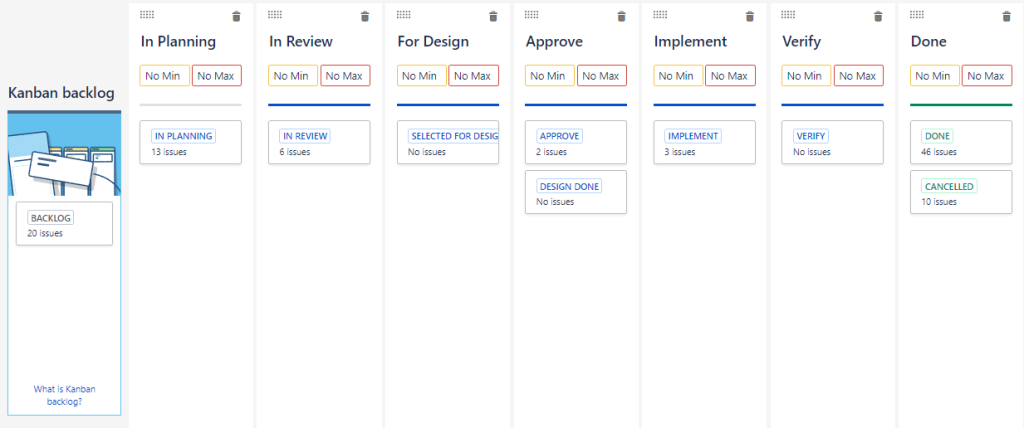
Here is a preview of the master workflow we will create in JIRA. To create this workflow, we made many new status labels and transition that do not exist in JIRA by default. When we make simpler workflows for teams and smaller projects, we want to make sure we’re using the same label so the data is clean, shareable, and easy to report.
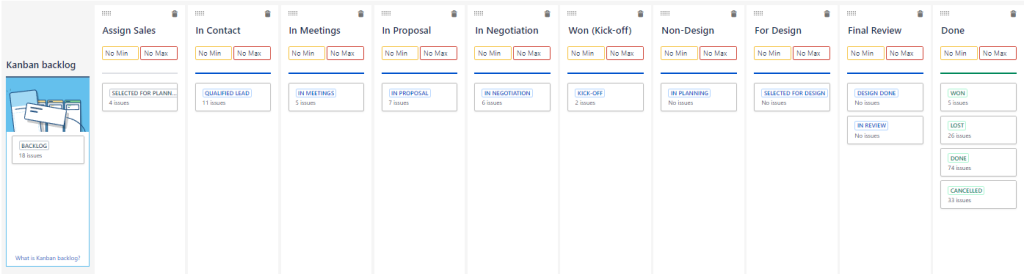
Here’s an example of a general team workflow that simplifies the master workflow by many steps, but still borrow some statuses.
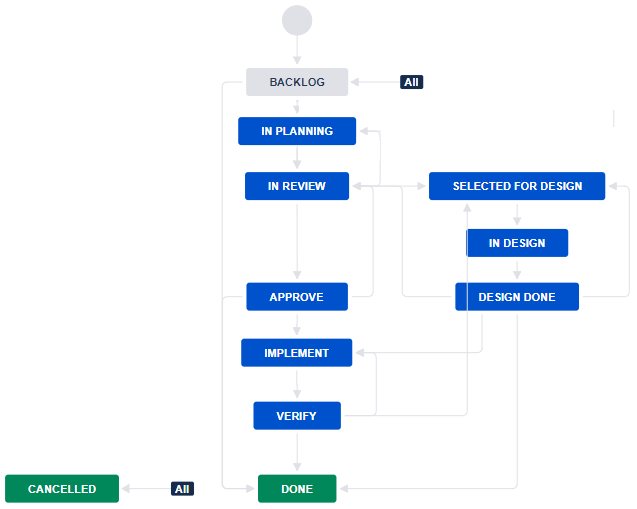
We need to share statuses, so all similar issues are organized together. For example, we want all issues for any project that needs design work to be shared with the design team. So, all of these issues need to fall under “For Design” status at some point of the workflow.
Project focused vs multi-project teams
Another point to consider, is how teams view projects. Are engineers focused on single projects and designers working on multiple projects at once? You will have control over how issues will show on each team or project task board.
Understand Your Non-development Teams
JIRA is great for software development, but can it be great for other teams, too?
We believe this can be true, so we also designed processes for our non-development teams.
Other JIRA workflows to consider:
- Corporate strategy
- Overview for all project managers
- Sales team
- Small projects
This resulted in a optimized general team type board which was simple but also capable of sending job requests to visual designers. The process uses the same master workflow, but fewer statuses to get things done.
We even created a flow for our sales team to replace are simple sales and crm processes. We used our general team flow and added new custom status that is compatible with our master workflow so some work can be shared with the design team.
Get started on JIRA
Once you have all your processes documented, be prepared to convert your list into JIRA status labels, and flow chart with transitions that connect each status.
We started using JIRA after our master workflow was decided, and continued to experiment live. However, we recommend to plan as much as possible beforehand to prevent too many changes or fixes that may cause confusion and stoppage to current projects.
We’ll show you how to set up everything in our upcoming articles.


Leave a Comment
You must be logged in to post a comment.