Share Responsive Web Design Layout Screenshots with Chrome Extension “Full Page Screen Capture”

Are you making every web design preview in Photoshop? Does it take time for every change you need to make for multiple browsers?
If you are in your frontend web development phase and would like to quickly share screenshots of live results, the Google Chrome extension “Full Page Screen Capture” will make your processes so much faster.
You will be able to capture exactly what the Google Chrome browser and user sees, instead of a theoretical design that has not been tested on browsers.
No more cutting and pasting image files!
First, open Google Chrome and get the Chrome Extension at the Chrome Web Store.
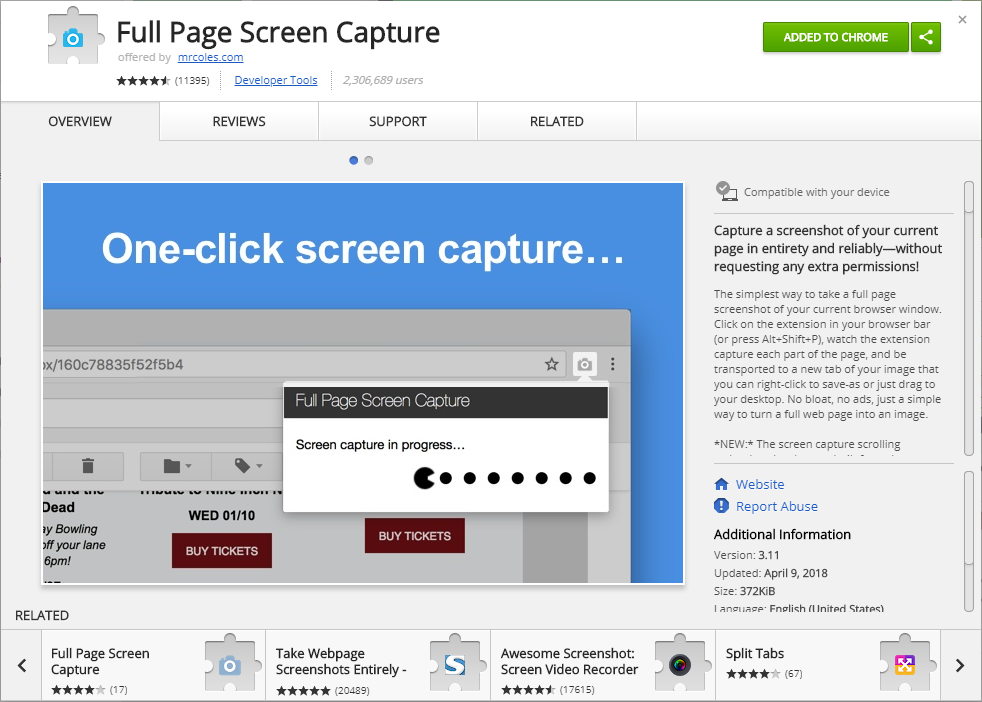
Select “Add To Chrome” and install to your browser. Restart your browser or computer if necessary.
A “Full Page Screen Capture” icon will show in your Chrome browser menu bar.

Go to a website you would like to capture a screenshot and select the “Full Page Screen Capture” icon.

Do not touch anything while the extension scans the website, otherwise your progress will be canceled.
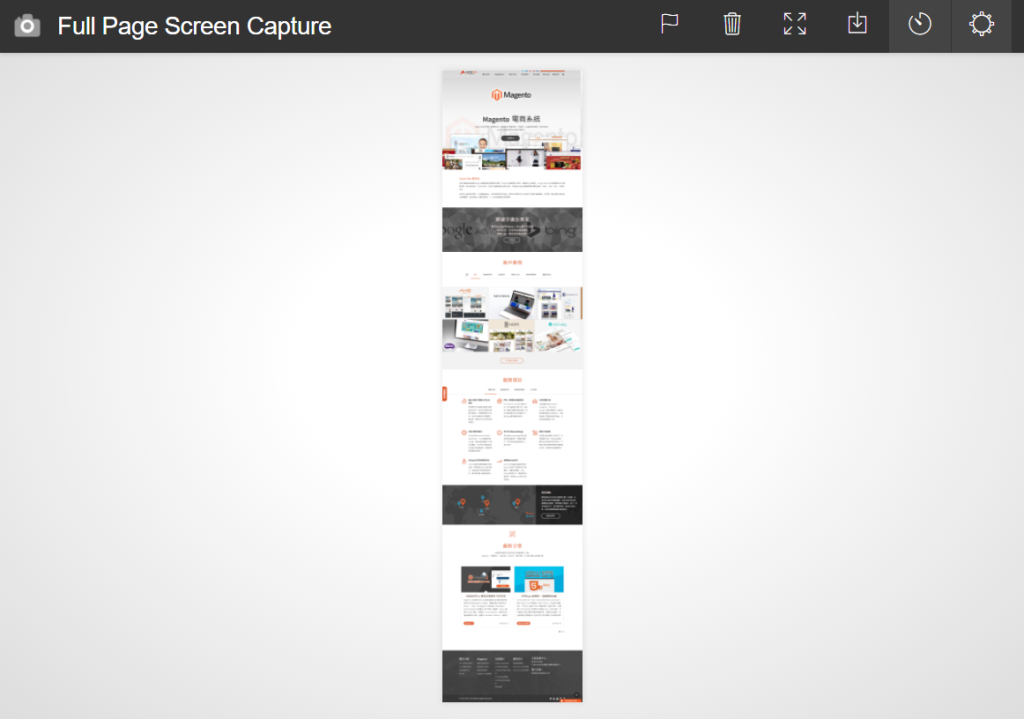
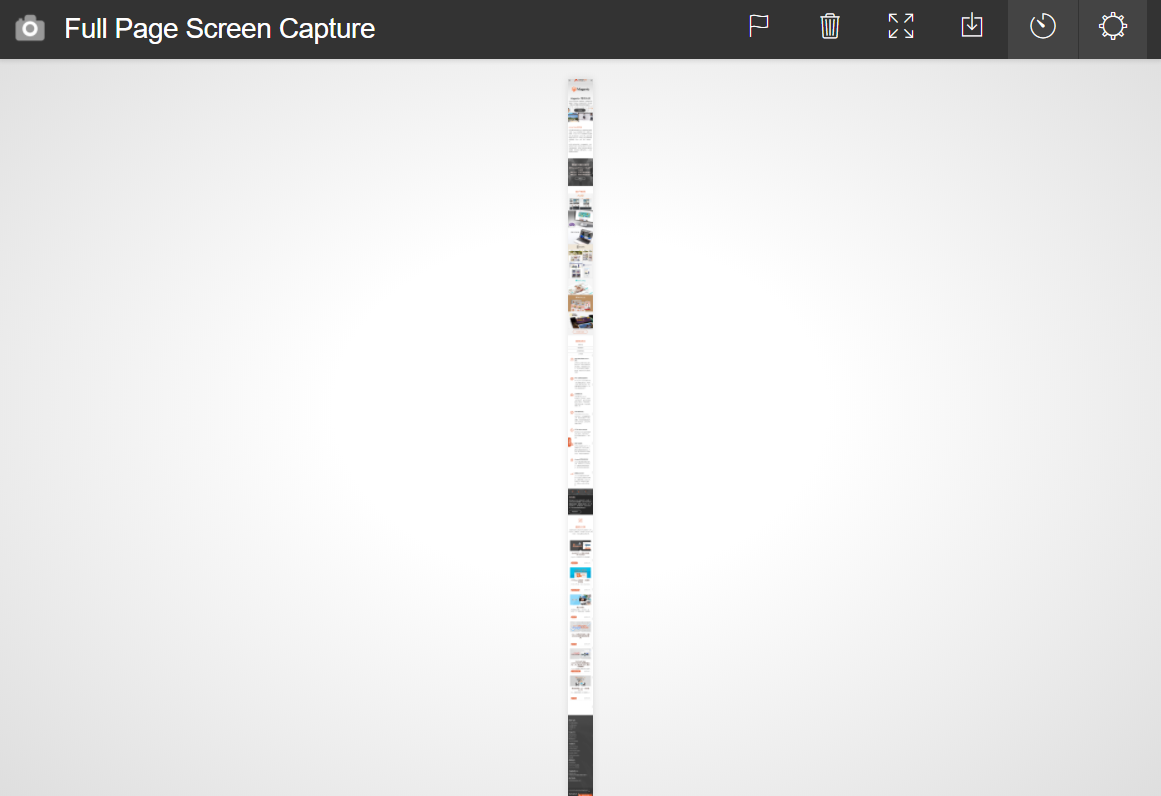
Once the capture is completed, a new tab will open with name “Full Page Screen Capture”. A full resolution screen capture will be displayed in the center of the page. Right-click the image and save the image.
Screen Capture Responsive Layouts
On the page that you want to show responsive layouts, press F12 to open Chrome Developer Tools. These tools will allow you to test different resolution sizes on the page you are showing.
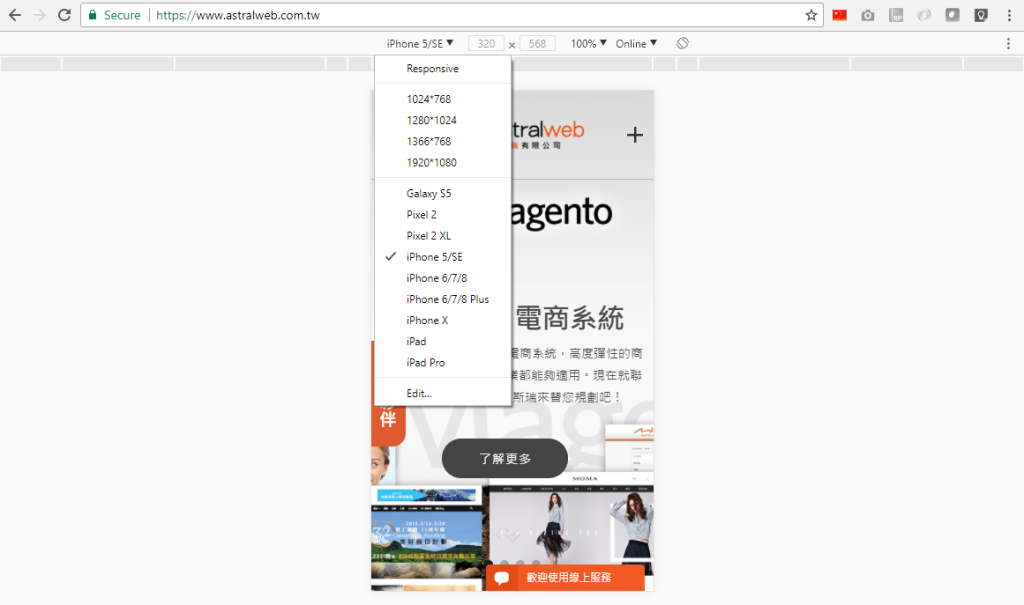
If you cannot see device options, make sure the blue “Toggle device toolbar” icon is selected in the Developer Tools panel.
Right-click the image to save the full resolution screenshot of your responsive layout.
What You Should Know
Websites that have interactive content and fixed objects may not show correctly in the screenshot. You should disable or fix the interactive objects in the state you would like to show in the screenshot. Otherwise, you can use 3rd party image editing tools to refine your screenshot before delivering.
Get Google Chrome
https://www.google.com/chrome/
Get Full Page Screen Capture Extension
https://chrome.google.com/webstore/detail/full-page-screen-capture/fdpohaocaechififmbbbbbknoalclacl
Using URL Builder to Improve Analytics Reporting
When using Analytics, Google itself has access to enough information to feed you a lot of data in terms of users’ interactions with your website, as well as where they originated from. However, there are a couple types of marketing efforts efforts that can lead to users accessing your site from sources that Google either can’t identify or can’t segment enough to be useful to you.
The two prominent examples are email marketing campaigns and running multiple ads on a single domain. In the case of email campaigns, google doesn’t have control over your email client, and thus doesn’t know where the email link originated. As a result, without using URL builder, one’s email campaign traffic will likely end up showing up under Acquisition Channels as Direct traffic. When running multiple ads on one website– you may have one banner ad, header, footer, plain text, etc.– google will not be able to differentiate which traffic came from which ad, preventing you from assessing their performance and adjusting accordingly.
In these cases, Google offers a simple tool to feed it the information it needs in order to give you this useful data- URL builder. Using URL builder allows you to create a custom url for your destination page and attribute the desired source information, in turn allowing Google Analytics to better display the exact behavior of users.
To access URL Builder click here or search for “URL builder” and ,if you’re logged into analytics, you should see a page like the following:

Taking the example of an email marketing campaign, what you’ll want to do is enter the url of the page that you are linking to in your emails. In this case lets say that I’m sending links to Astral Web’s content page:
![]()
I then fill out the boxes as required below:
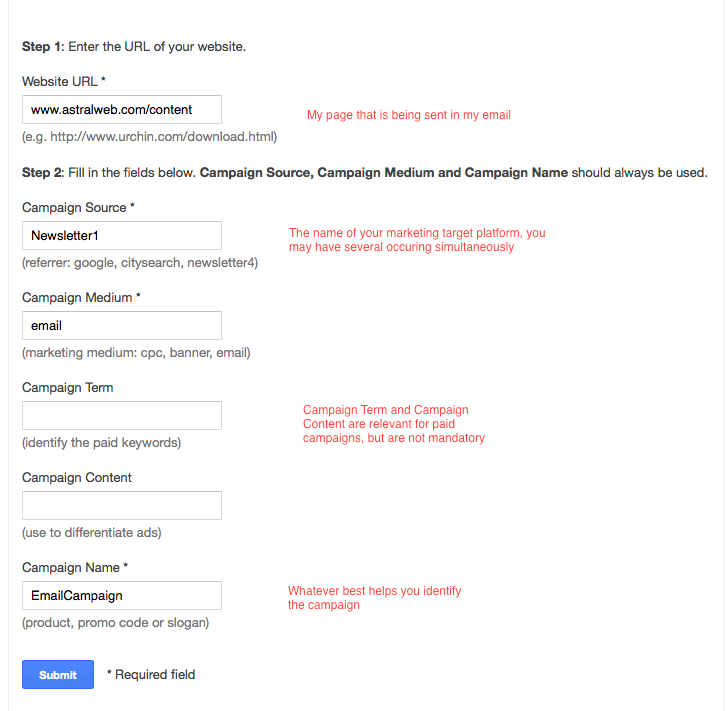
*when copying and pasting destination URLs, be sure that they do not contain any excess coding or characters- you’ll end up with a non-functional link.
After clicking Submit, we’re given a long link that includes all of the information that has just been entered into URL Builder.

This is the link that I’ll want to put into my emails (or ads, etc.) in order to identify them in analytics.
In order to ensure that the link is functional and visible in analytics, paste this link into a separate browser window while you’ve got your viewing your Real Time > Traffic Sources. As you can see below, if the link is functioning properly, you’ll be able to see it almost immediately in Analytics. Furthermore, all the information you’ve input to distinguish the medium, campaign, and target are now identified by Google, and Analytics can give you the kind of information that is really crucial to optimizing your marketing campaigns.

If you’d like more information, please check out Ori’s video tutorial on using URL Builder.
Beginners link maintenance / Monitoring 404 errors
Your website’s links represent fundamental building blocks of your online presence and visibility. Both routing traffic in from outside, as well as internally within your site, a non-functional link can be extremely harmful to one’s business—Just as one who seeks out a physical address only to find an empty lot, so a 404 file-not-found page is likely to turn away someone who had the intention of engaging with your web site. By accessing your website through Webmaster tools and Google Analytics, one can identify and begin to resolve such errors.
Firstly, by accessing one’s site through Webmaster Tools (in this case Astral Web), one can see the links that google has been unable to find as it crawls the web. Below, one can see that this information is accessed by selecting Crawl > Crawl Errors and entering 404 in the drop-down box above and to the right of the list of errors.
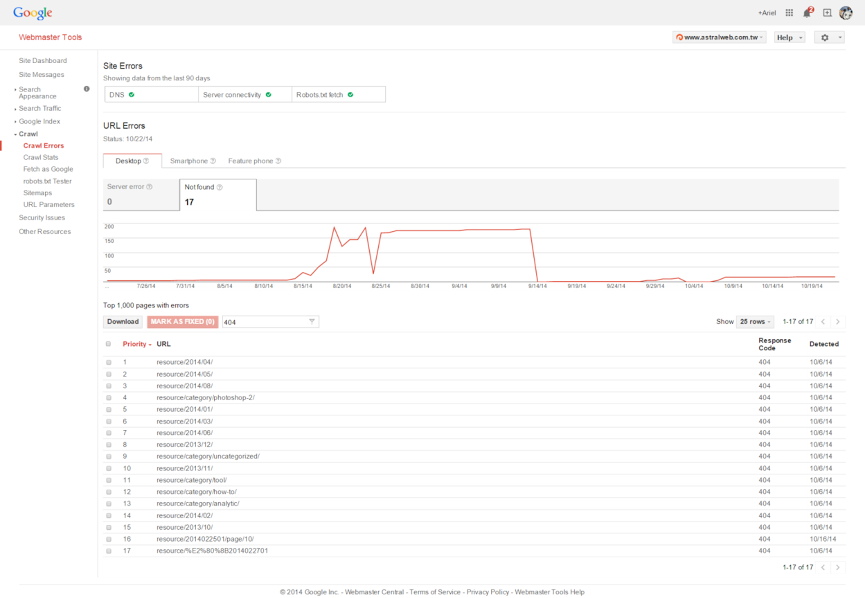
This is your first list of non-functional links that may need to be addressed.
Google Analytics offers a more detailed, customizable display of link errors. Following the steps outlined below, one is able to access a list of 404 errors that have been encountered through external links, which can be particularly undesirable to a websites effective presence.
Once in Analytics, select Behaviors > Site Content > Landing Pages:
.
This results in a list of landing pages for your website, which are ranked by frequency. Secondly, you’ll want to add a Secondary Dimension defined by Page Title:

Once this is done, click on the advanced search option:

Enter 404 to delineate your search to instances of 404 errors:

At this point you should be left with a comprehensive list of all 404 errors that have occurred within your domain, appearing something like this:

By identifying these non-functioning external links, you have the opportunity to resolve potentially significant numbers of 404s that each represent someone’s intention to access your site’s services or content. Addressing such issues has equally significant potential to affect your site positively. Utilizing Webmaster Tools and Google Analytics, you can maintain your link functionality, taking a significant step in the maintenance of an effective web presence.
Setup Virtual Phone Number & IVR Extensions /w Twilio
This article shows you how to implement IVR extensions with your twilio phone number.
Step 1 – Register with phone number from twilio
If you haven’t done so already, go to twilio.com and get a phone number.
Step 2 – Setup scripts and XML on server
Before you tell Twilio to handle your voice calls with the following scripts, you’ll need to create them.
a. XML file – Output to twilio is handled with xml. Your xml file will run as soon as a phone call is initiated. This xml for example has an intro message and asks the user to input a 1,2,3 or 4 and sends response from phone to our second file, a php file.
Please make sure that you input your intro message and specify at the end of xml, the full URL path of your php processing file. In this case it’s http://www.example.com/handle-incoming-call.xml
<?xml version="1.0" encoding="UTF-8"?>

<Response>

	<Gather action="handle-user-input.php" numDigits="1">

		<Say voice="woman">Welcome to COMPANY.</Say>

		<Say voice="woman">In order to further assist you. Please listen to the following:</Say>

		<Say voice="woman">For sales, please press 1.</Say>

		<Say voice="woman">For technical support, please press 2.</Say>

		<Say voice="woman">To speak with Bob, please press 3.</Say>

		<Say voice="woman">For all other inquiries, please press 4.</Say>

	</Gather>

	<!-- If customer doesn't input anything, prompt and try again. -->

	<Say voice="woman">Sorry, I didn't get your response.</Say>

	<Redirect>http://www.example.com/handle-incoming-call.xml</Redirect>

</Response>
b. PHP file – This file gets the input from xml (number dialed) and checks the day of the week and time. then it runs a few if statements and either redirects phone number and calls a phone or redirects via a twiml to a voicemail with special message recorded in mp3.
<?php
$dayofweek=date('D');
$hour=date('H');
if(($dayofweek!='Sat')&&($dayofweek!='Sun')){
if(($hour>17)&&($hour<23)){
//ok time to call
$ok='1';
}
}
header('Content-type: text/xml');
echo '<?xml version="1.0" encoding="UTF-8"?>';
echo '<Response>';
$user_pushed = (int) $_REQUEST['Digits'];
if ($user_pushed == 1)
{
echo '<Say voice="woman">Connecting you to, sales.</Say>';
if($ok!='1'){echo '<Redirect>http://twimlets.com/[email protected]&Message=http://www.example.com/ftZLg.mp3</Redirect>';}else{
echo '<Dial>+13105551212</Dial>';}
}
else if ($user_pushed == 2)
{
echo '<Say voice="woman">Connecting you to, technical support.</Say>';
if($ok!='1'){echo '<Redirect>http://twimlets.com/[email protected]&Message=http://www.example.com/ftZLg.mp3</Redirect>';}else{
echo '<Dial>+13105551212</Dial>';}
}
else if ($user_pushed == 3)
{
echo '<Say voice="woman">Connecting you to, Ori Tzvielli.</Say>';
if($ok!='1'){echo '<Redirect>http://twimlets.com/[email protected]&Message=http://www.example.com/ftZLg.mp3</Redirect>';}else{
echo '<Dial>+13105551212</Dial>';}
}
else if ($user_pushed == 4)
{
echo '<Say voice="woman">Connecting you to, operator.</Say>';
if($ok!='1'){echo '<Redirect>http://twimlets.com/[email protected]&Message=http://www.example.com/ftZLg.mp3</Redirect>';}else{
echo '<Dial>+13105551212</Dial>';}
}
else {
echo "<Say voice="woman">Sorry, You dialed an invalid number.</Say>";
echo '<Redirect>http://www.example.com/handle-incoming-call.xml</Redirect>';
}
echo '</Response>';
?>
* reference – http://www.twilio.com/docs/howto/ivrs-extensions
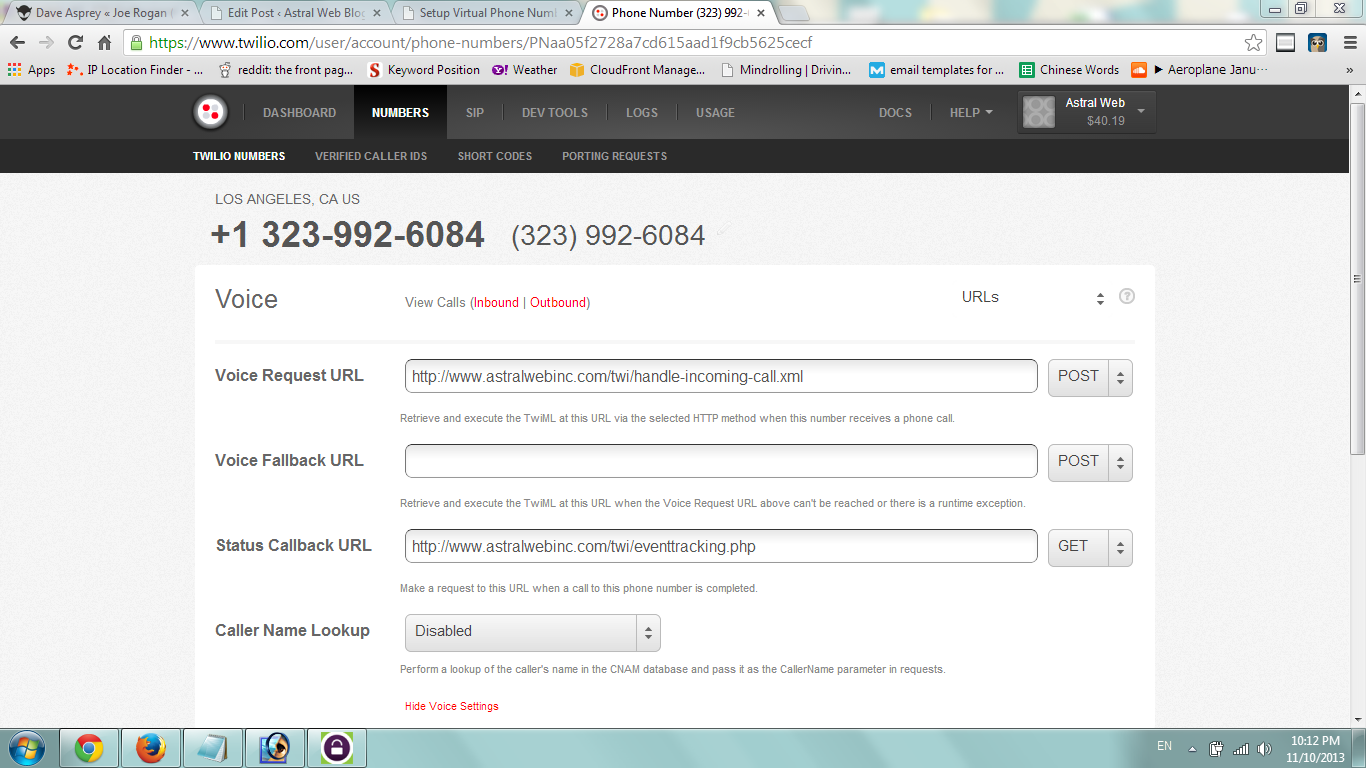
Step 3 – Login to twilio.com and reference script
Go to “numbers” page, and click on your phone number. Under the “Voice Request URL”, enter the full path on your server to the xml file and click on “save changes”.
That’s It!.
Please feel free to view complete “how to” video or comment at bottom of this page with any suggestions or questions.
Video Transcription:
Would like to show you how to implement a virtual phone number via a twilio phone number, setup extensions and an automated system (IVR) and to setup some a timed programmatic addition to redirect phone number based on time of day and day of week. In order to implement this, we use a twilio phone number. Twilio enables you to rent a phone number and do simple programming to enhance phone number (voice and sms). In addition twilio is very affordable.
Let’s dive in and begin. We setup a phone number. the test is, anytime someone calls on a weekday during specific business hours, we want to enable them to go to specific extensions, (sales, technical support, etc), and if not within business hours or weekend, it will redirects to voicemail. Pretty soon, we’ll show you the programming.
Register with twilio.com, get a number and login. Go to the “numbers” page and click on phone number. We want to tell twilio what to do when a voice call comes in via the field of “voice request url”. We can select all or inbound and outbound. Also you can set what script to run in case of a sms message. Right now, we’ll go over the voice option. We setup a file on our webserver. In order to actual ger more information, go to twilio docs (http://www.twilio.com/docs/howto/ivrs-extensions). you can download their zip file and read their examples and documentation to help you understand more. IVR allows you to create extensions. For example, an intro message and “for this, press 1, for this press 2” and the script will know how to handle it. Other than php, the examples may be in other languages as well. The docs explains what happens. when a customer dials a twilio number, it goes to twilio’s server and the server triggers the url we just specified. I’m going to dive into this pretty quickly. We’re now going to go to the ftp and create this file. Now’s we’re using our ftp client and editing our php script. In our voice request url, we told it to go to our xml file named
handle-incoming-call.xml. Let’s edit this file. It’s a simple structured xml file which says the following. Whenever you gather an input from the phone call, send it over to another file, our php file. Say in a woman’s voice “welcome to astral web”, then pause and say “in order to proceed”… “for sales press 1”, etc etc. The gather field will listen to the phone and will send info to the php file and if someone did not press a correct number the xml repeats the same menu and waits for correct dial/input. Now let’s edit the php file and look inside. Again the output of the file is in xml and the file listens to the input. If the user presses 1, it will run the first part, if the user presses 2 and on and on. If nothing was presses, it will say in a woman’s voice, sorry you dialed an invalid number and will redirect to the original xml.
the script will check if it’s during business hours and if so, it will redirect/dial to another phone number and if not, it will play the mp3 from twimlet which we earlier recorded for voicemail. Twimlet is twilio’s own language which enables us to add more coding at we did via the twiml is redirect to voicemail, send an email and play as the message on voicemail an mp3 that we recorded.
Instead of mp3, you can input regular text. for example, hi i am not in but remember that in the url, you cannot have spaces. Replace spaces with plus signs “+”. Above in the code, we set the time and date and then checked in if statements.That’s it! I wanted to give one more tip on xml. Make sure you always have double quotes and quotes are closing correctly and that your header is in xml. If you have a problem, you can diagnose via your dev tools and logs area. Don’t forget to test that everything works.


