This article is a part of Astral Web’s Comprehensive Guide to JIRA!
Previously: 08 Getting Started with JIRA: Manage Your User Profile
General Configuration
After we have added some users that can help configure and check our changes, we can now complete our general configurations that apply to your entire JIRA system.
The “Title” of your JIRA should be related to the overall system. We just simply named ours “Astral Web’s JIRA”. The naming isn’t too important, since the most prominent place you ever see it is in the tab title area.

A very useful setting is the “Introduction” section. This section allows for some basic JIRA markup code that lets you add links, styling, and images.
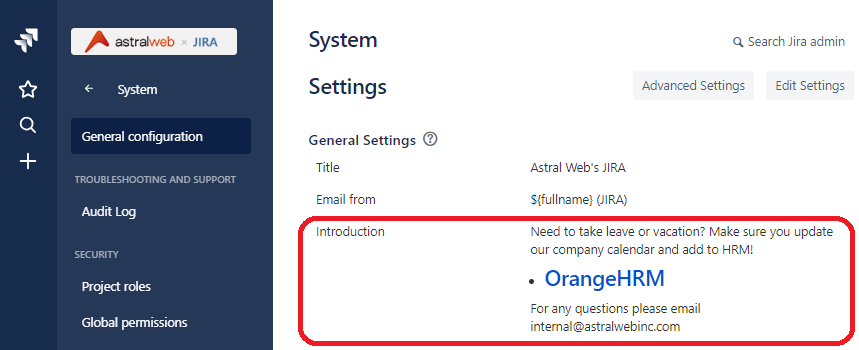
Go ahead and select “Edit Settings” to make changes.
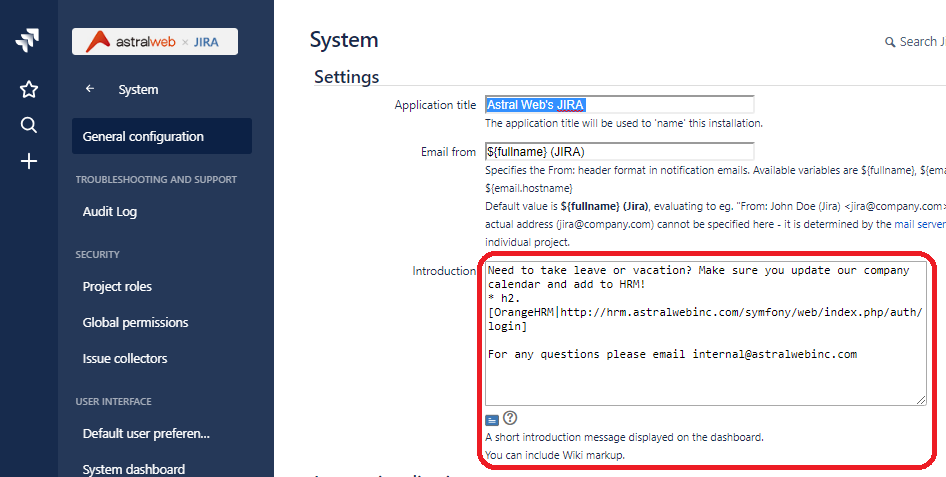
JIRA dashboards don’t allow any html code (unless you buy a 3rd party plugin), but you are able to add the “Introduction” block, so it may become useful for sharing important notes with all of your users.
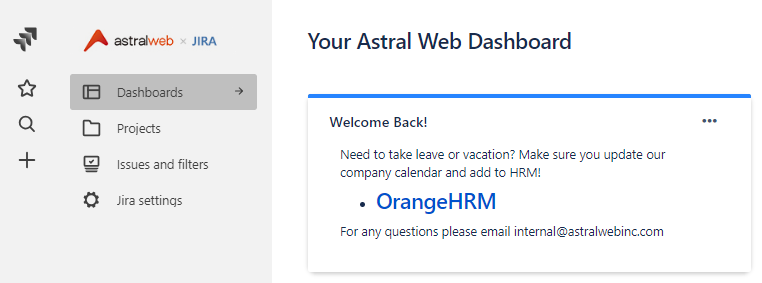
Here is an example of how our Introduction block looks like on our main dashboard.
Use the “Internationalization” settings to configure default language settings for all of your users. We use JIRA in both English and Chinese with English being our primary language, so we have “Other” for Indexing and “English” as our default system language. Language display settings can be changed per user as described in our previous User Profile article.

Options are useful if you want to customize even further. We used the default setting as-is, but you can optimize what users see and access by turning on or off all the features you actually need to use. For example, Voting is a great feature for prioritizing issues, but we don’t use it in any of our teams. So, we could turn it off and keep it hidden from all of the interfaces. For now, our teams just ignore these options if we don’t need them.
Security
Security options are going to be important if you have different types of internal or external users on your project teams. You don’t want all of your users to have admin powers that allows them to accidentally add or remove important users, features, or billing options. Define which users are admins early on, so only specific users have access to these high-level options as described in our previous articles.
Project Roles
Project Roles are what you want to change for all the types of users you want to define and configure permissions for.
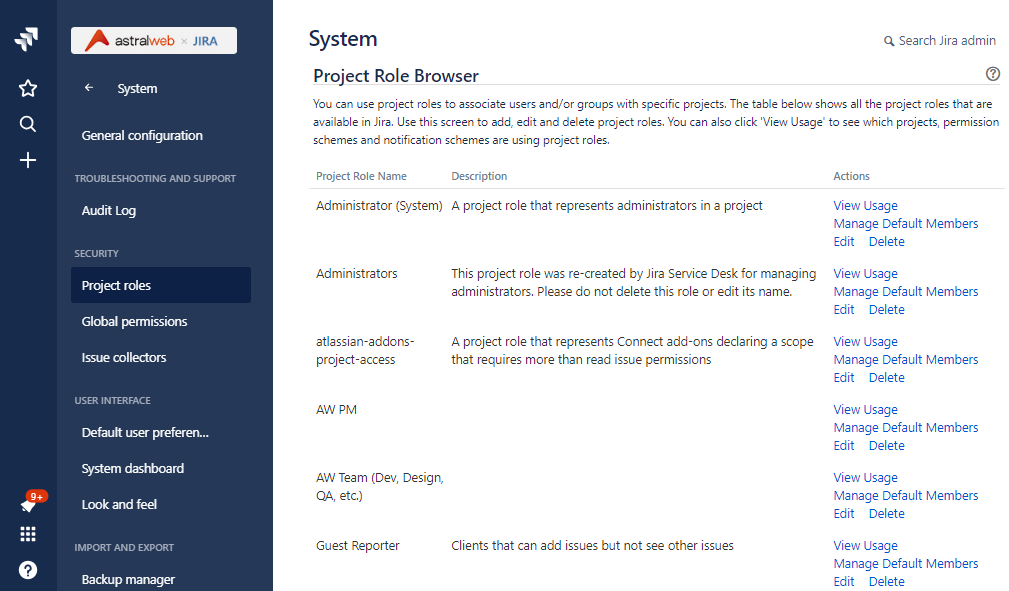
In addition to the system Administrators roles, we have added “PM (Project Manager)”, general “Team Member”, and “Guest Reporter” roles.
Project Manager Roles
PMs will have full access to their own projects allowing them to add/remove users and configure their projects as they please. The highest-level option they have is to delete their project. They cannot change global settings such as system settings, workflow schemes, etc.
General Team Member Roles
Team Members can only be invited to a project by a PM, and can only create, edit, and delete issues within the project. They can see other users’ issues and support editing them, but they will not be able to change any project settings.
Guest Reporter
Guest Reporters are roles reserved for our external stakeholders who need access to our project tickets. They can never see other projects, nor can they view issues they are not related to. So a PM must assign or add a Guest Reporter as a watcher to tickets they need access. Otherwise, the Guest Reporter can create and modify their own issues within the project.
Add Your Custom Roles
Above are examples that we use, but you should add your own custom roles as necessary. Go to the bottom of the list to “Add Project Role” to add your own.
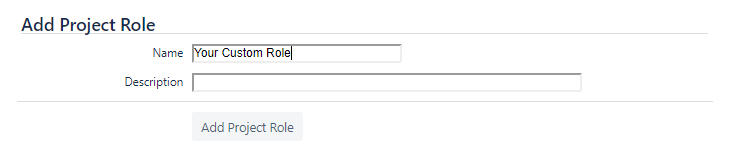
The new role will be added to the list. You will be able to add this role to different “Permission Schemes”. We will explain after our next step to set up “Global Permissions”.
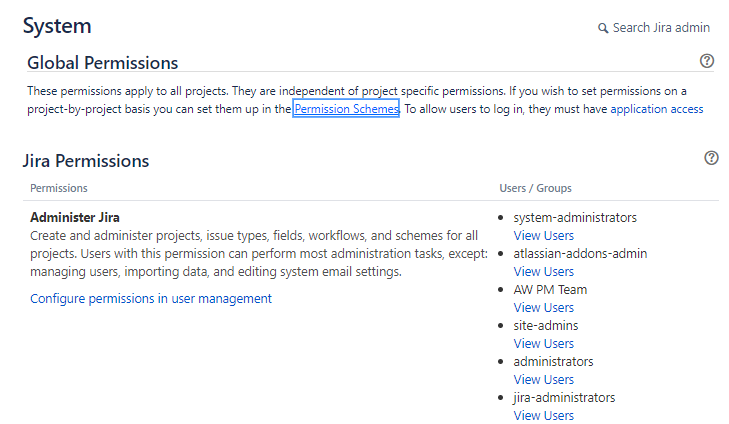
Global Permissions
Global Permissions are configurations for top level users. If you have multiple Atlassian tools, you will be able to configure how different admins can access the different tools. Global Permissions apply to all projects, so you will most likely only add admin groups or users in this area.
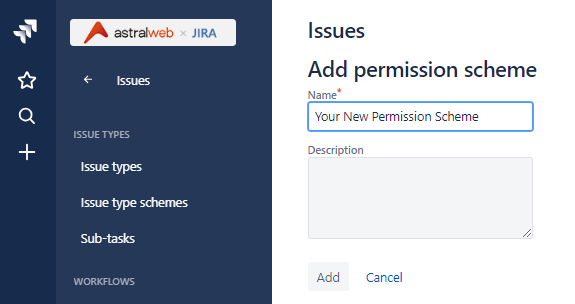
To add your new Project Roles to different permissions schemes, select the “Permission Schemes” in the description or click the “Permission Schemes” on the left menu panel.
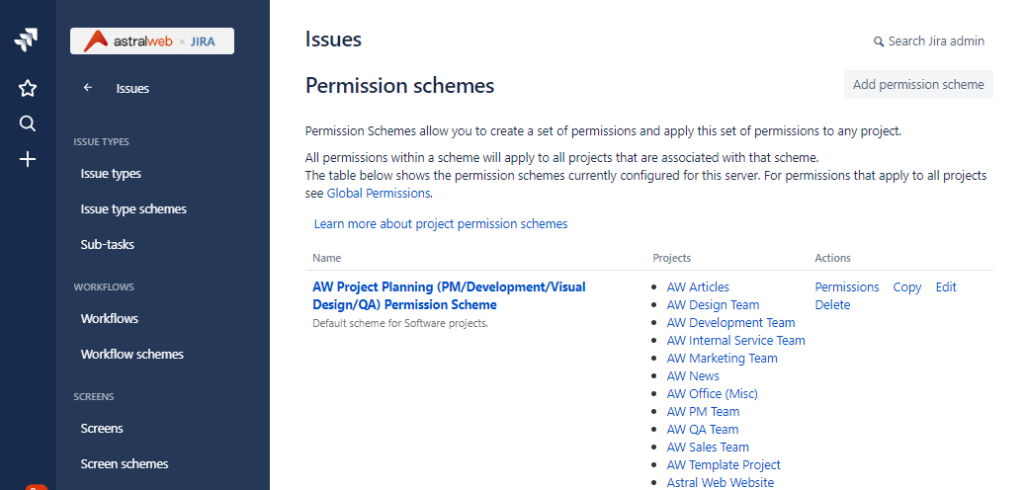
We created a new permission scheme that we apply to all of our projects that we create called “AW Project Planning”. You can do this by selecting the “Add permission scheme” button on the top right.
After you create a new scheme, it will be listed on the permissions schemes list page. Select “Permissions” under the actions column to change configurations.

Inside the scheme, you will see a list of actions and options for Projects, Issues, Comments, and more. You can assign different roles to each of these actions. Once a role has been assigned to an action, then the user within that role for each project will be able to access the feature. For example, we add PMs to the “Administer Projects” permission so they can make high-level changes to projects. We do not add other roles. Other general roles are added to the “Browse Project” permission.
In this way, we continue to add our roles to permissions so we can balance security, efficiency, and necessity for all of our teams and projects.
Next we’ll show you how to change your JIRA interface appearances.


Leave a Comment
You must be logged in to post a comment.