Phone Call Event Tracking with Google Analytics & Twilio Number

This article explains in a simple manner how to track phone calls and call duration with twilio phone numbers and input into google analytics (universal) for event tracking.

Step 1 – Make sure you have google universal analytics on your website

If you don’t, please install the latest tracking code or upgrade at google.com/analytics

Google Analytics Universl Code

Step 2 – Register with twilio and get a phone number

Register and login to twilio.com

Twilio

Step 3 – Create script to input into google analytics

All you have to do is add the following code to a webpage on your server.
DON’T FORGET TO:
a. change ANALYTICSACCOUNTID to your account analytics account id (“UA-xxxx-xx”)


<?php

$datetime = date('m-d-Y--H:i:s');
$call=$_GET['CallDuration'];

header("Location: http://www.google-analytics.com/collect?v=1&tid=ANALYTICSACCOUNTID&cid=123&t=event&ec=Contact&ea=Call&el=$datetime&ev=$call");
exit;

?>

Step 4 – Reference script in twilio

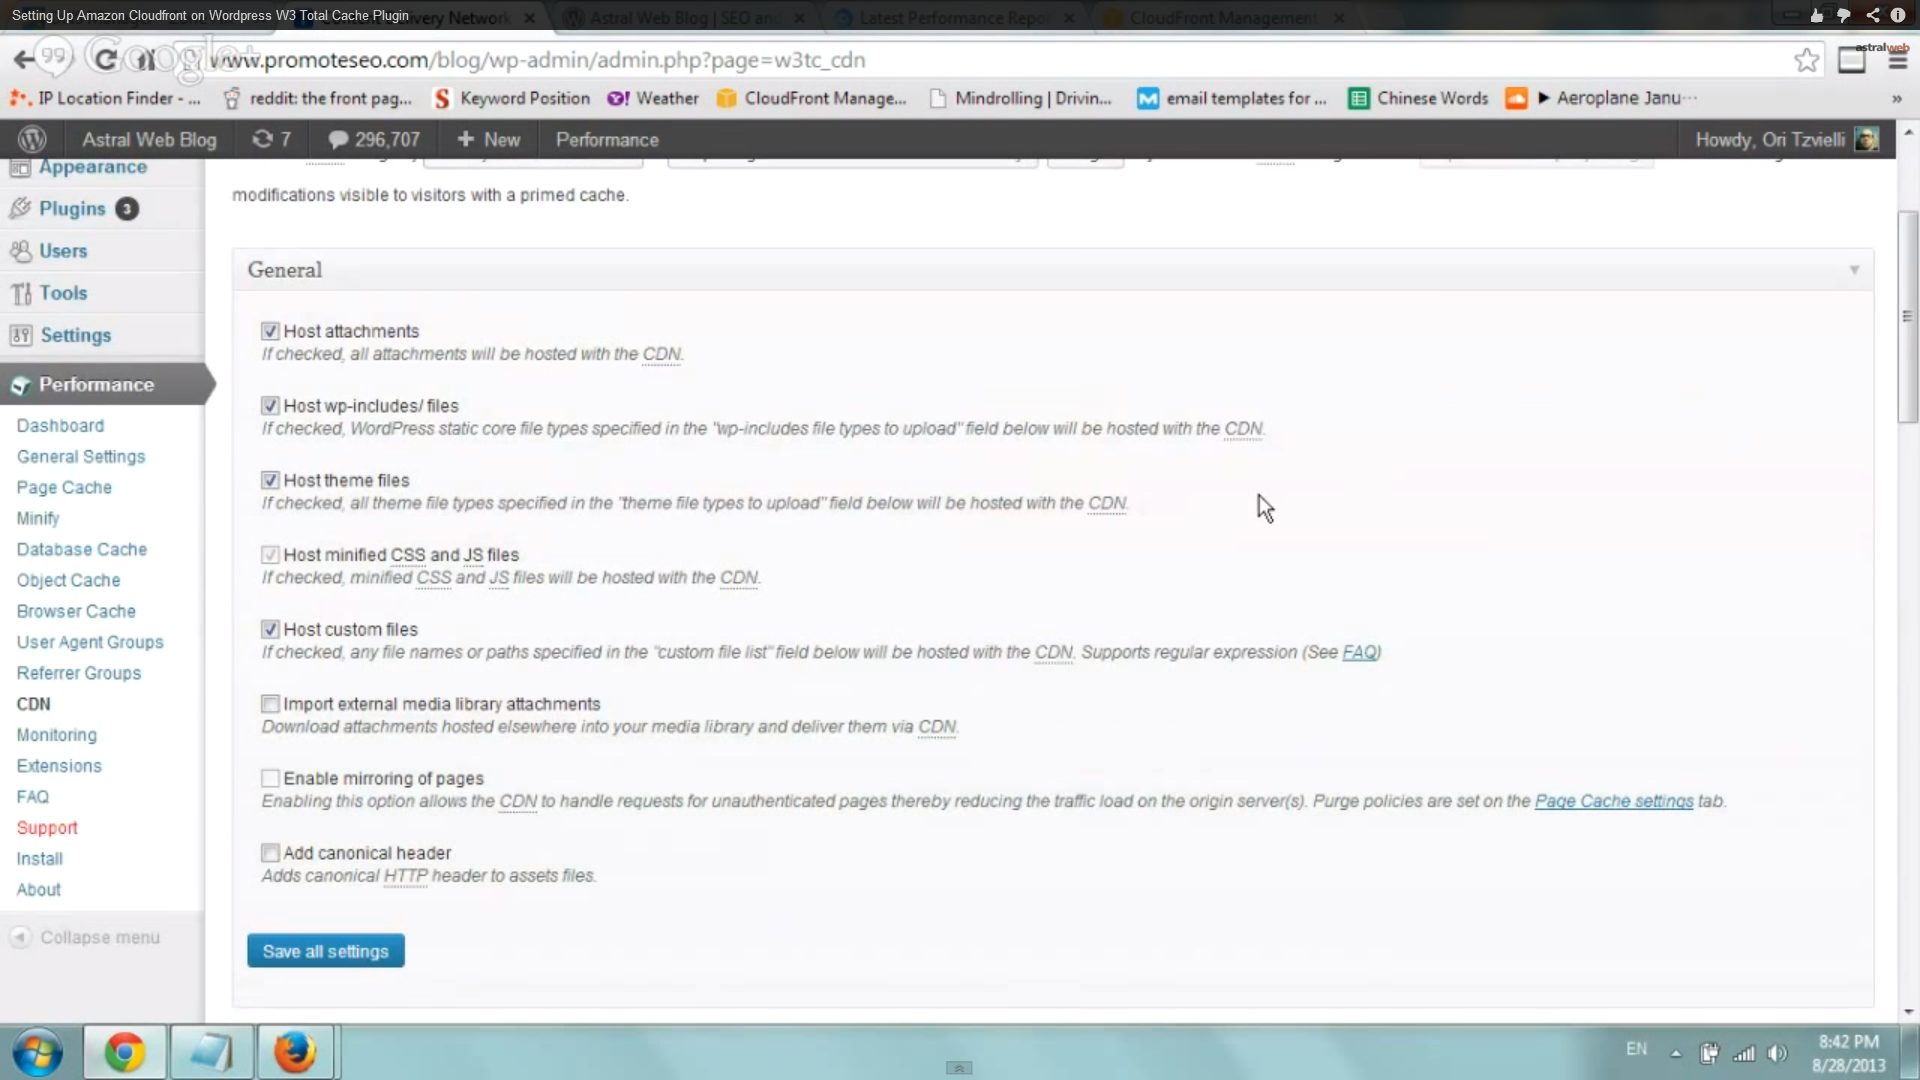
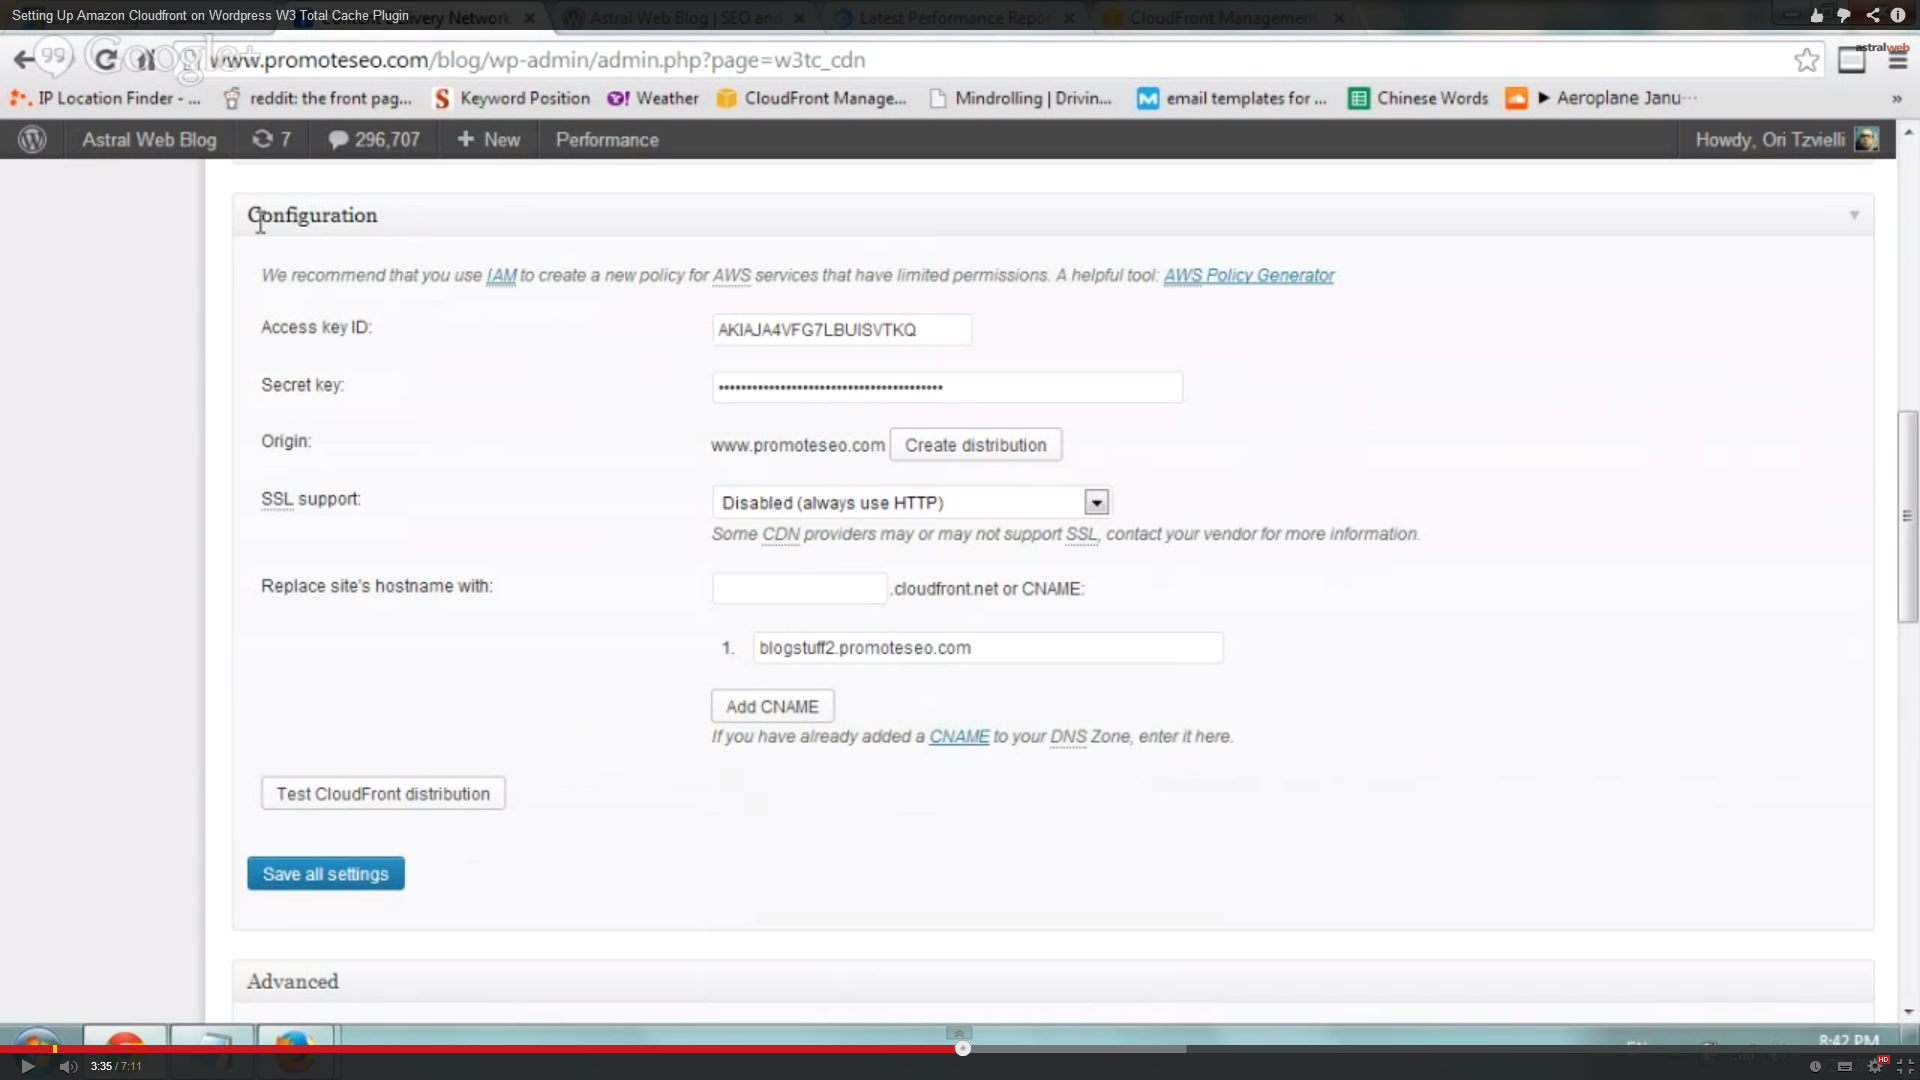
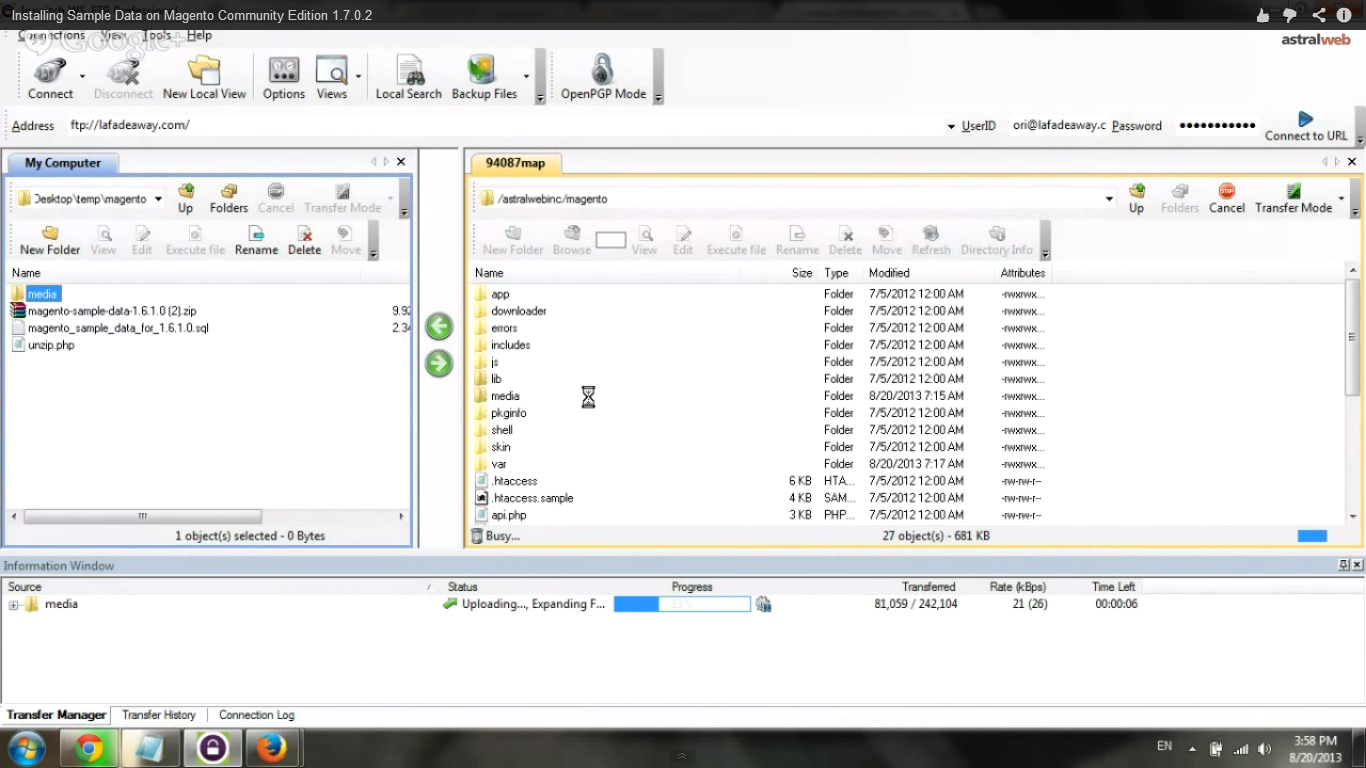
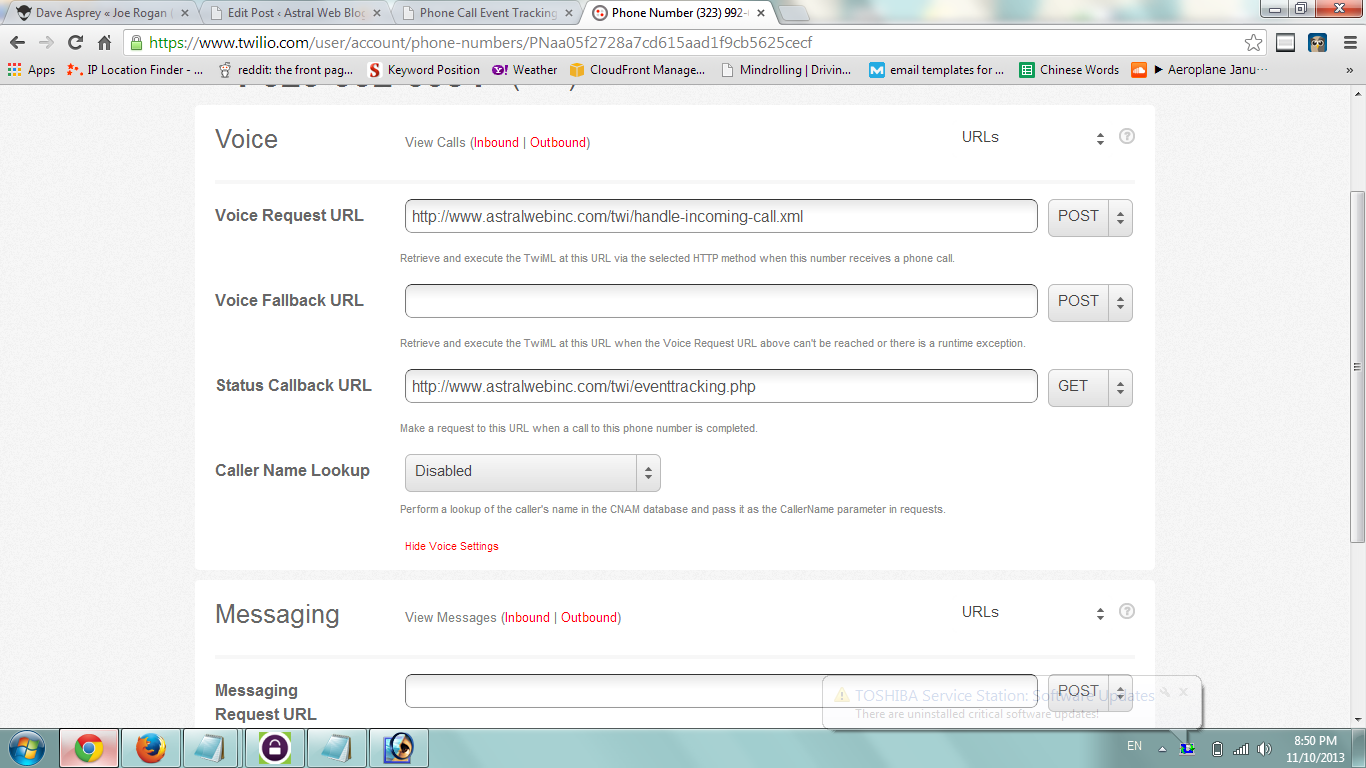
After you login to twilio, on main dashboard page, click on “numbers” page and click on your phone number. Under “voice” section, click on “optional voice settings” in order to open more options and add url of script we just created to “Status Callback URL” and click on “save changes”.

* see google guidelines at Google Analytics Universal – Measurement Protocol Developer Guide –https://developers.google.com/analytics/devguides/collection/protocol/v1/devguide

Status CallBack URL

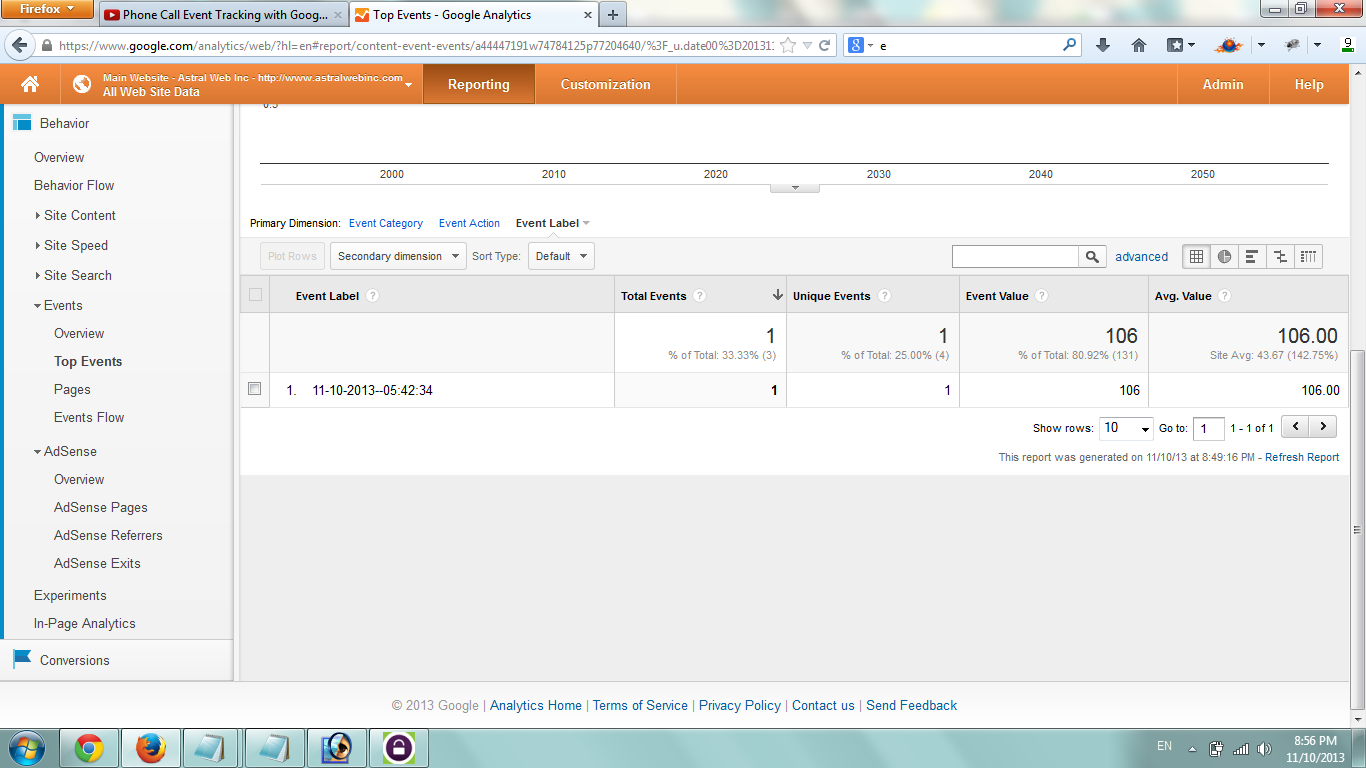
Step 5 – Test in Analytics

Make a phone call and look at the real-time events section and test over time.

Look at analytics events

Hope you enjoyed this simple video. We love twilio and analytics, especially the bridge between offline and online.

Let us know if you have any questions. We’ll be happy to help!

Video Transcription:

Hey everybody. This is Ori from Astral Web. I’m very excited to create this video to show you how we bridge the gap between the offline and online world. in this video we’re going to track everytime someone calls our phone number, we’re going to put into google analytics the duration of the call. This is a very simple example so you can understand what’s going on and you can build upon that. Very cool thing – let’s dive into it very quickly. The first thing we want to do is buy a twilio number. Twilio is a really nice company and enbales you to add programmatic addons. Go to twilio.com and register and we recommend them. After you register with twilio , login and click on phone number and go under the voice section under optional voice settings and status callback url. What that means is anytime a phone call is completed, at the end of the call it will trigger the url you specify. We will create this script in a second. The script will then take information from twilio and input it into google analytics. Very cool!

Let’s look at the file. eventtracking.php. Let’s go to our server via ftp client and edit eventtracking.php. All you have here are 3 or 4 lines. What i actually did was included the date and the time in order to track in analytics when the call was made and the GET field we receive from twilio. After you get the time and the date from the server plus you might want to adjust the time if your server time is different from you home or work computer. After that you will use the latest google analytics universal url (/collect/). If you don’t have analytics universal you will need to install on website. Let’s look at code and check if we have latest analytics universal code. You can also check in analytics in admin, tracking info and tracking code. It should say, this is the universal analytics code… It came out a few months back (as of 2013). Looking at the redirect header url, google analytics enables you to pass offline information via a collect url in a very simple manner. Now you have to insert different fields. TID is the account id starting with UA dash …. CID is just a userid and this case we don’t use it. Now we specify that we want to track an event. EC category is called contact. EA is the action is called call and the label is the date time and the value is the call duration. So anytime someone calls you at the end of the call, twilio will go to your specified url and the script will give analytics the call duration. And i’ll show you how it looks. In the events section in analytics, you’ll be able to see time of calls and durations. You can translate into minutes instead of seconds. To test, make a phone call and go to google analytics, real-time and look into events and make sure it works correctly.

If you’re running a pay per click campaign, you might want to have different phone numbers
for your landing pages or from SEO. Try to have a unique twilio number for your website, different from your regular store or other numbers for better tracking. Super simple code and works real well. If you have any questions, i’ll be happy to share and answer questions.

Setup Up Amazon Cloudfront CDN on WordPress W3 Total Cache Plugin

Site Speed is one of the most overlooked aspects of a website (at least in my opinion). There have been many research articles about user abandonment due to slow site speed (for example). If possible try to have your website load in less than 2 seconds.

We take this seriously with our clients and love speeding up websites (i personally don’t like racing cars so websites are good for me)

Let’s begin:

Step 1: Install W3 Total Cache Plugin

Login to WordPress and Visit the “Plugins” tab and click on “Add New”. Search for W3 Total Cache Plugin and Install

Install WordPress Plugin

Search for W3 Total Cache

Install W3 Total Cache for Wordpres

Step 2: Sign up for Amazon Cloudfront CDN

If you haven’t done so already, please sign up for Cloudfront at aws.amazon.com. You will need to sign up, enter billing information and proceed to next step.

Sign up to aws.amazon.com

Step 3: Go to Settings and Setup Cloudfront Distribution and W3 Total Cache

In WordPress go to:

Plugins -> Add New -> Install W3 Total Cache Plugin

Scroll down to the CDN box and enter information

CDN -> Enabled

CDN Type -> Amazon Cloudfront

Click on “Save”

Set as CDN Amazon Cloudfront

On Left “Performance” Tab, Click on “CDN”

Go to CDN Tab

Select all desired checkboxes to select what you want to store on CDN

Checkbox Desired CDN Settings

Scroll down to configuration and make sure you have the access key and secret key. You will be able to get access key from https://console.aws.amazon.com/iam/home?#security_credential

Next, you will want to Click on “Create distribution (+ wait 10 minutes)

Click on “test” and save

Tip: You may want to add a CNAME in your dns to keep the CDN references on your subdomain. Great for cleaner URLS and ease of changing CDN’s in the future (see end of video on bottom of this article for CNAME details)

Configure CDN

Step 4: Test Site and Speed

You of course will want to test that the CDN works and site functions correctly and quicker. First visit your domain and check that the site loads correctly and Second, see end of below video for details on how to test specific load speed via gtmetrix.com

Please let us know if you have any questions. We’ll be happy to help!

Check Load Speed of Webpage

In order to analyze how fast your website or specific webpage loads, you will want to use an analysis tool. We like using gtmetrix.com especially because it shows the specifics of load time and helps us find bottlenecks and issues with our site.

Step 1: Go to Gtmetrix.com

Gtmetrix Tool

Step 2: Check Website/Webpage

Enter into text box your specific webpage and click on “Go”

Step 3: Look into Data

Take a look at the “Breakdown” and “Recommendations”

Especially look into tabs

– pagespeed
– yslow
– timeline
– history

Page Speed Data

Page Speed Timeline

Video Transcription:

Hey everybody. creating another site speed tip video and just wanted to talk about how do i and webmasters, site owners figure out how fast is there website loading. one tool that we use a lot is gtmetrix.com. it’s not our site, just a simple tool. i think they do a really great job at diagnosing each part of how the site loads. so all you have to do is go to gtmetrix.com, insert your domain name. let’s insert ours for example and click on go. it’ll fetch the page and then figure out what’s taking time and give you some information about how long is it loading, what are the specific parts and what can you improve. so you can take those guidelines and improve the site in general. so once i did this i put our website right here and it gave us a page speed grade of a 96% and y slow page grade of b. and it tells us that the entire website with css and javascript loaded in 2.7 seconds. the total page size size including all external pages, html, javascript and css and there were 47 different files including php and css. so this is how long the website took to load, 2.7 seconds. and you know maybe this is sufficient for you or not but if you go down here, there are 4 tabs and it’ll tell you what you’re scoring in each of the things, and of course try to improve the ones that you have bad grades. one example of speeding up website load is instead of having separtae images you can combine some of them in css sprites and have multiple in one so the browser fetches less images. the next tab is yslow, and on and on. so you can see all of these improvements to do and the other thing i really like looking at is the timeline and that shows you how long ever single file took to do fetch and not just how to fetch but also each component of dns, server wait and transfer. so you can see the php file, the index file, took .1 seconds and on and on. and you can figure out if you have 404’s or specific very large files or take a long time to download. hope you enjoyed this. thanks!

Installing Sample Data on Magento Community Edition

In this article we’ll show you how to install sample data for the Magento Community Edition. This sample data is mainly used for learning about Magento and setting up data so you can test your developed themes and functionality.

* please note that importing sample data is done BEFORE you install Magento.

Let’s begin:

Step 1: Download Community Edition:

Go to magentocommerce.com/download and download sample data
* sample data version number is okay to be lower than you magento version

Download Magento Sample Data

Step 2: Create a MySQL Database

Go to your hosting account and create a mysql database (note your login info for later)

Create Mysql Database

Step 3: Unzip Sample Data Files on Server and Import

After you unzip your files, you will want to:

a. import .sql file via phpmyadmin (to database)

Import .sql file in phpmyadmin

b. import media folder into /media (magento main folder /media)

* you will need to first extract magento files on server (see step 4 below)

Import Media folder into Magento

Step 4: Magento Installing

(see video from other tutorial)

(see tutorial on how to install magento ce)

quick steps:
– download magento community edition
– upload to server and unzip
– copy “media” folder to magento main directory (see above step 3)
– go to url and fill out info on each screen

* Troubleshooting – if product images do not appear, go to media/ folder and rename .htaccess file (temporarily do so)

Let us know if you have any questions regarding this topic. Thanks for reading!!!

Track Email Campaign with Analytics URL Builder

You will always want to evaluate each and every campaign that you run and separate data based on your efforts and different avenues in order to reach conclusions.

Email campaigns are no different. We tyipcally use Analytics URL Paramaters via the Analytics URL Builder Tool to tag our email efforts.

Step 1: Visit Google Analytics URL Builder

Go to https://support.google.com/analytics/answer/1033867?hl=en

Step 2: Enter Info into Form

– Enter Landing Page
– Enter campaign Source
– Enter Medium
– Enter Term
– Enter Content
– Enter Name

Analytics URL Builder Form

Step 3: Copy URL

Copy URL from below form

Copy URL from Form

Step 4: Paste into Email Marketing Campaign as Link

Paste your URL Builder link into your email

Paste Link

Step 5: Test Link and Send out

Step 6: Evaluate Data in Google Analytics

Video Transcription:

Hey everybody. It’s Ori from Astral Web. Just wanted to talk about something that has come up lately with our clients. The issue is tracking email marketing campaigns, newsletters, email reachouts. When you send out emails to your customers, clients, whomever it is, you want to track that your specific emails are getting clicks to your website so you actually know your campaign is doing good. Aside from open rates, you want to know that they’re coming to your website and converted. And if you’re going to include a simple links such as www.example.com, you won’t see where it came from, which newsletter if came from, if it was a direct visit from a yahoo mail, etc. So what you want to do is track what you are doing. Go to google analytics url builder and all you have to do is fill out all fields with asterisk and associate it in your email campaign. You’ll be able to track a lot of information and it’ll give you so much more. I
ll so you how to use it quickly. Type in website url the url. Now the source for email newsletter can be newsletter1. and the medium would be email and campaign terms and content is more for ppc and adwords. Now let’s go to name, emailweekend. And all you do is click on submit and you copy this url and paste it in your email link, not just www.domain.com. On last thing before you move forward is to test url’s in email because some sites do not handle this correctly as they process php for example in a different way. You don’t want your web pages to break. Always test. Hope you enjoyed this video. Thanks!