12 Getting Started with JIRA: How To Manage Issues

This article is a part of Astral Web’s Comprehensive Guide to JIRA!

Previously: 11 Getting Started with JIRA: Issue Management with Basic Agile Workflow

How To Manage JIRA Issues

Editing and assigning issues are good features, but now it’s time to understand best practices on how to manage all of your issues in JIRA.

In general, we will look at two types of users who will be using issues: Managers (those who are responsible of assigning tasks) and General Users (those who are responsible for doing the tasks).

Managers need to schedule, customize, and inter-relate all existing issues to successfully achieve project goals. Sometimes, they will need to bulk change multiple counts of issues and maybe even change security permissions on individual issues if non-employee users need access.

General Users will need features such as attaching files and images (such as screenshots), commenting, logging work progress, and get notifications on issues they need to follow.

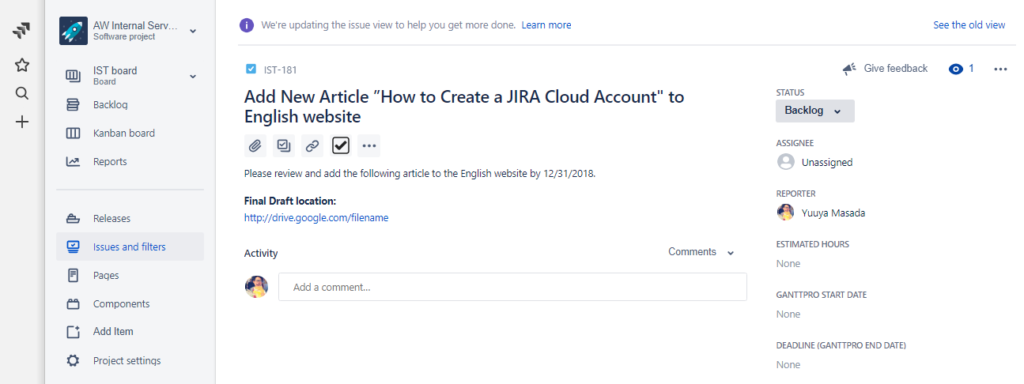
Below we showcase all the options that are available on each JIRA issue.

Useful Features For Managers

Here are useful features for manager level users on JIRA. Make sure your permissions (described in other sections of our series) are set if or if you don’t want managers to have access to these features.
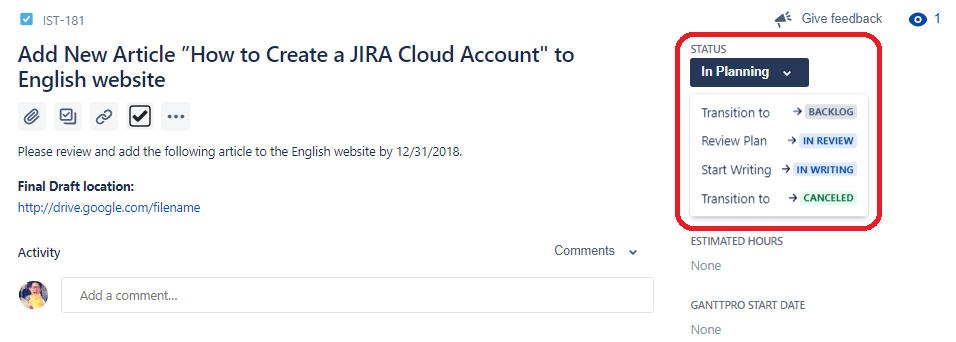
Scheduling an Issue

The default method to add a schedule to an issue is using the “Due date” field. This field uses a date field so, you’ll easily be able to save dates. You will be able to use this date field to show on dashboard widgets or export to calendar data.

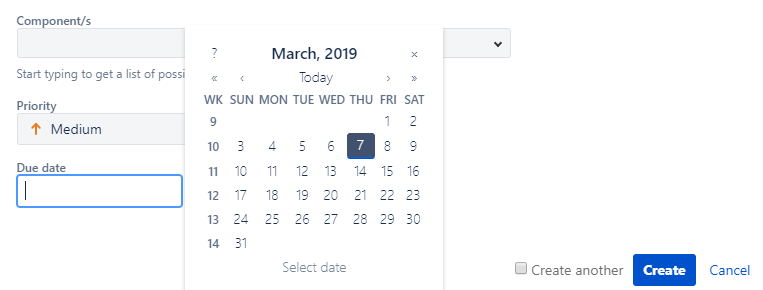
However, Astral Web uses external gantt charts (GanttPro) so we configure custom fields called “Start Date (GanttPro Start Date)” and “End Date (GanttPro End Date)”. We then disable the default “Due date” field so all of our staff use the same fields to schedule tasks (whether they sync to the external GanttPro tool or not).

In this way, all members can track their issues by due date on their dashboard calendar, while managers can continue to use GanttPro using same end/due dates.

Adding a field to an issue

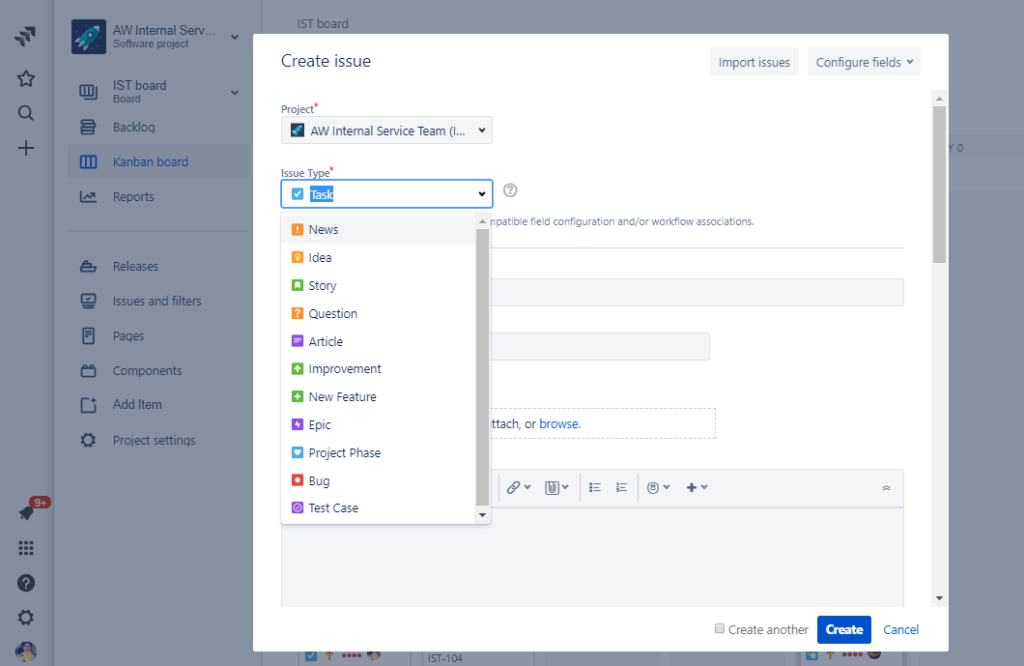
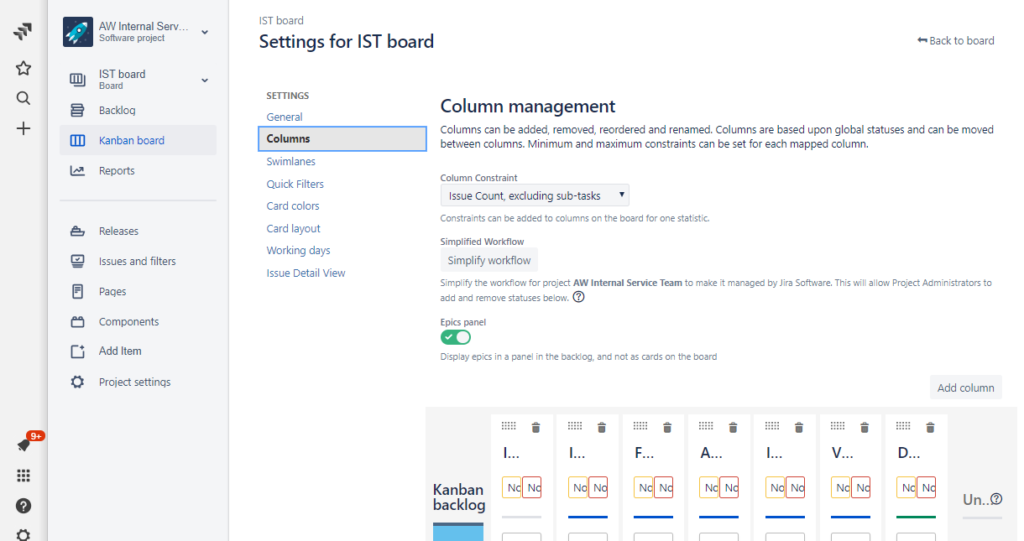
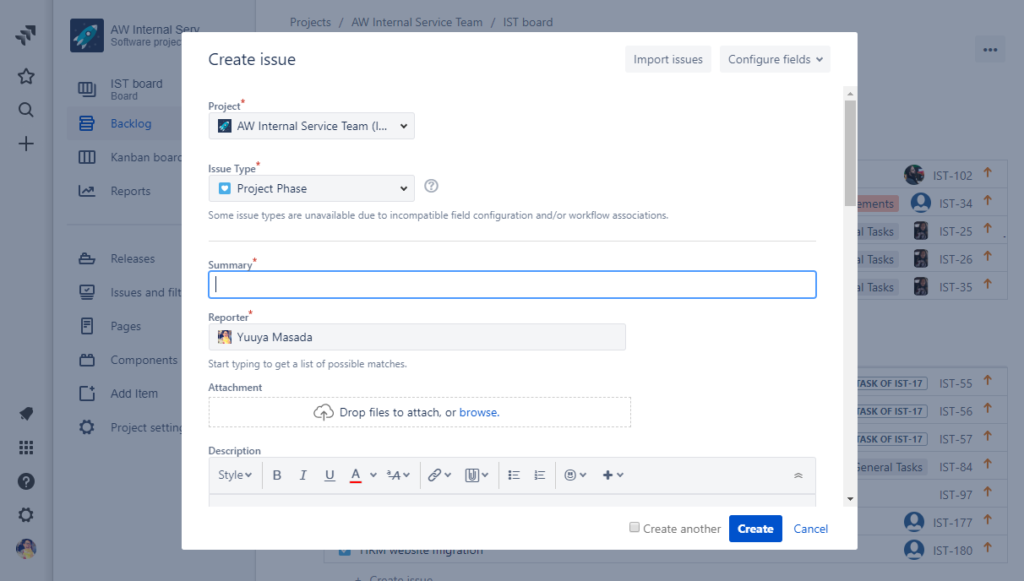
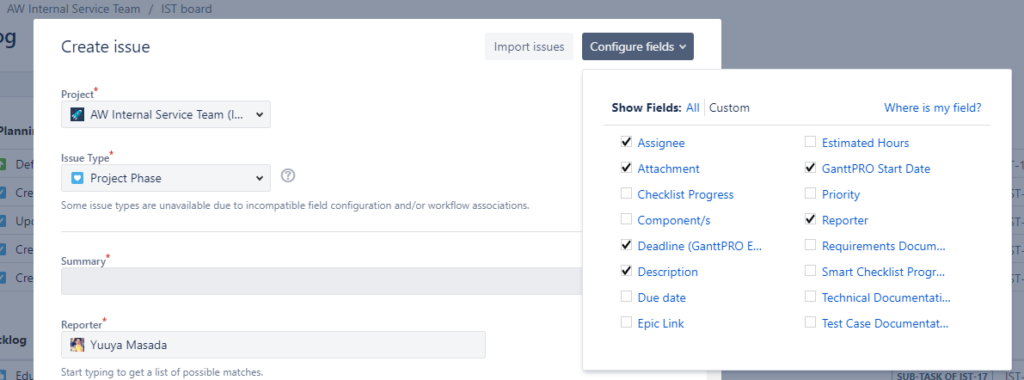
By default, some fields may not be showing on the screen you want to fill details. The available fields vary by different screens: Create Issue screen, Edit Issue Screen (both sidebar and full screen), and others. On the Create issue screen, you can select “Configure fields” to see which fields are active and others that can be added. You will need to have management permission to access this feature, but most manager and general user level should be able to see. If it is not visible, talk to your administrator.

Creating issues using the CSV importer

While creating issues directly on JIRA is convenient, sometimes you may have a whole WBS (work breakdown structure) document that you want to import. You will need to organize your template to make sure that all attribute headers and values match your project settings, but once this has been done, it’ll be so much easier when you want to add dozens or hundreds of tasks at once.

In our case, we know we have custom fields that we sync with external tools, so we make sure those fields are covered in our template. We even have a master projects template that holds about 150 tasks that helps kick-start our managers to make progress on their projects.

To bulk import your tasks, make sure your document is converted into a .csv file. (In Google Docs, you can export using File > Download as > Comma-separated values.) Then, you have to options to access the import page.

One is the “Import issues” button from the “Create issue” screen.

Or, from Admin > System > Import and Export > External System Import.

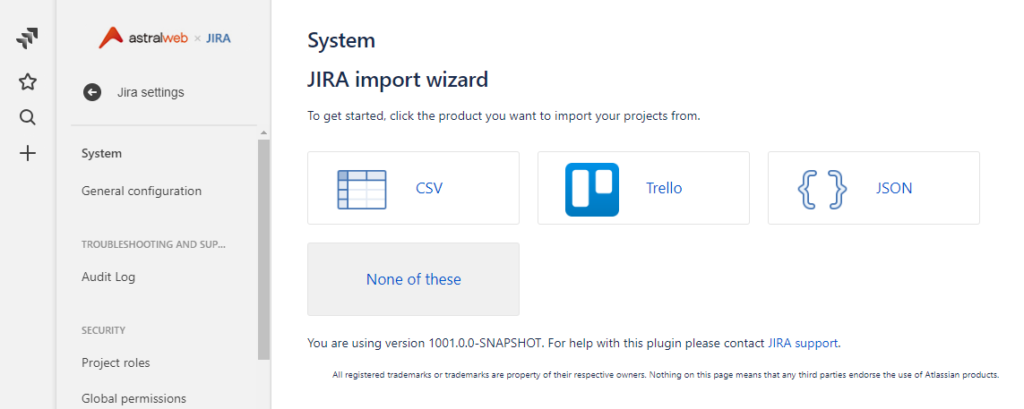
Then, you will be at the import csv page where you can select your .csv source file.

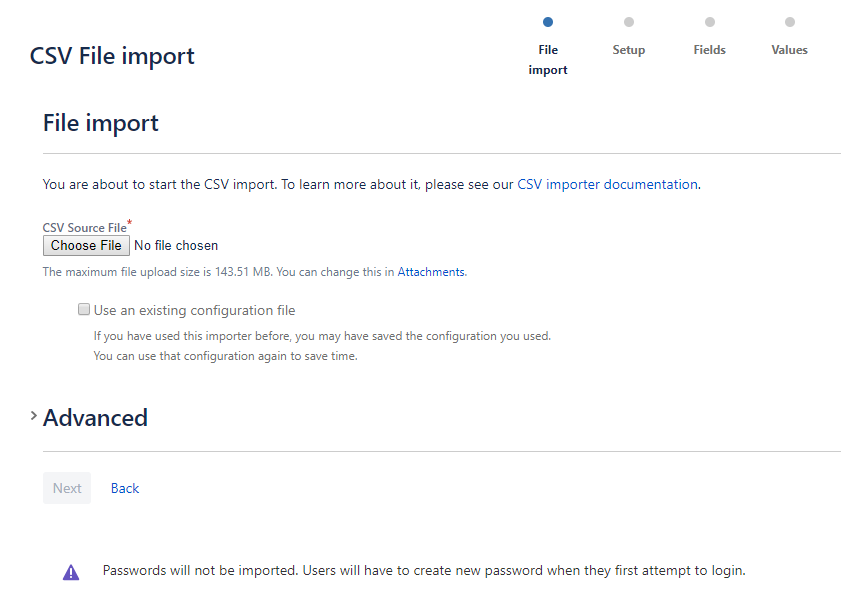
If you import often, then creating a configuration file that helps you assign issues to projects and map all data values to the right headers. You can get this at the end of the import, if you would like.

Select “Next” button.

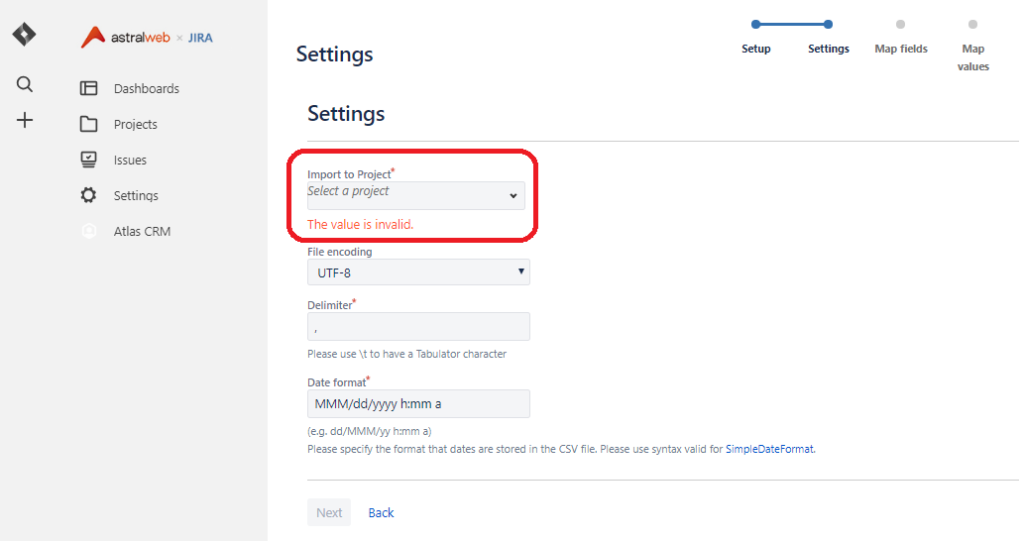
Select your project that you have created under “Import to Project” dropdown.

Select “Next” button.

All fields should automatically be assigned. If there is no issue select “Next” button.

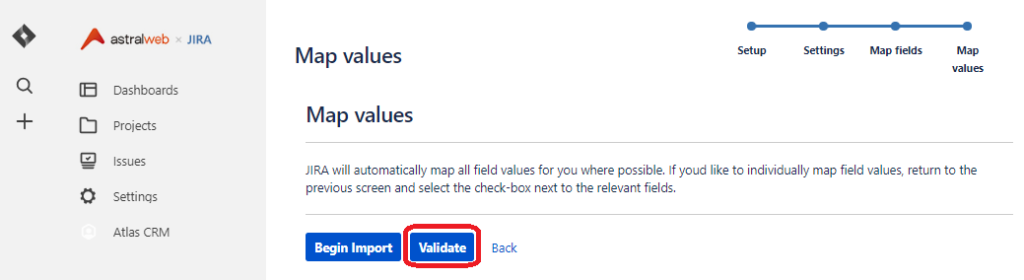
To make sure your data is good, press “Validate” button. This process may take a few minutes.

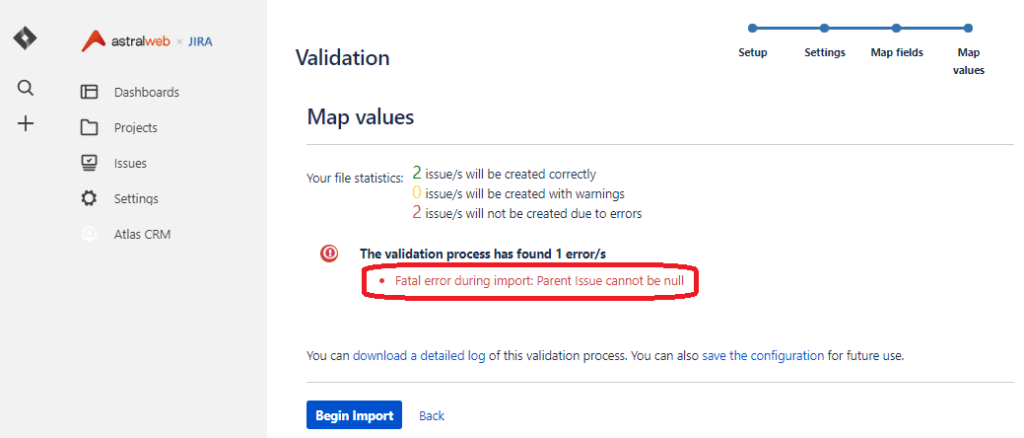
If you have more than one error, please fix your CSV file.

If you only get one error “Fatal error during import: Parent Issue cannot be null” you are ok. This is because the validator does not know that Sub-Tasks cannot have a unique ID.

You can proceed to select “Begin Import”.

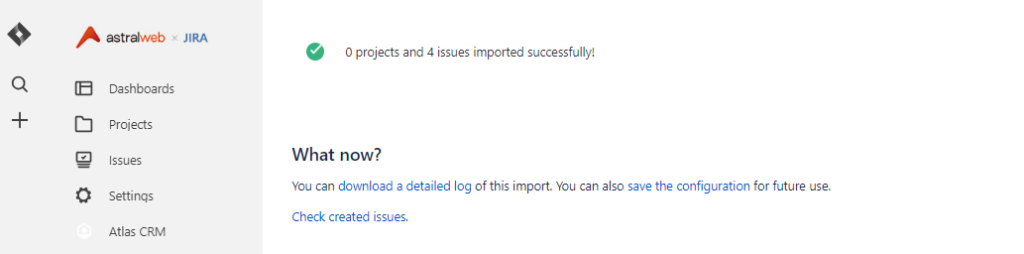
Confirm that the count of issues are the same as what you have prepared in your CSV, and your import is all set.

Creating a Sub-Task

Sub-tasks are useful when a large issue needs to be split into smaller tasks, such as when you need to assign different people or multiple deadlines are required.

If you are on a full-page issue, then you will click on the “Create subtask” icon.

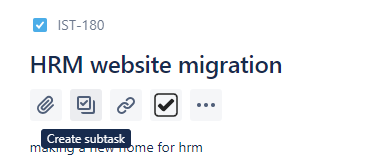
You will be able to quickly add sub-tasks that are under the current parent issue.

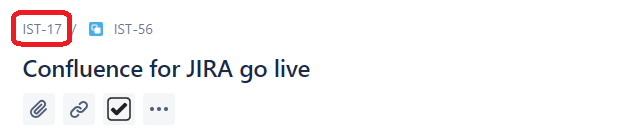
After you add a sub-task, you will be able to edit and manage the sub-task like any other issue. In the breadcrumbs, you will easily notice that a task is under another parent issue. This feature of of many that is helpful for managers to organize different levels of tasks. You may also find other features such as Epics, Versions, and Components useful when creating task relationships. (Details in our topics!)
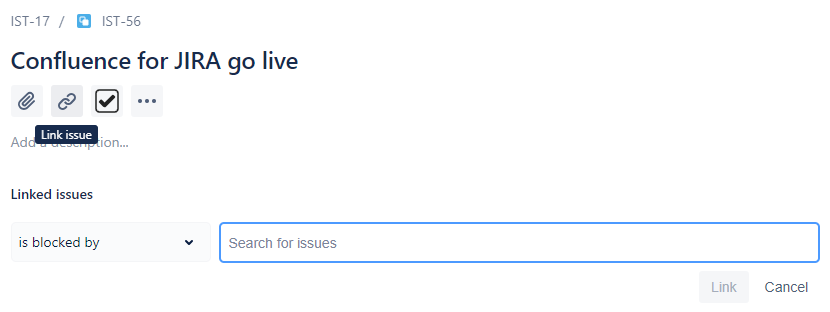
Linking Issues

Using sub-tasks is limited 2 levels, so you will not be able to assign many issues under another. Instead, you can use issue linking. Linking issues are useful or tasks such as bugs, so you know that a bug is related to a specific issue.

On the full-screen issue page, you can select the “Link issue” button to show the Linked issues block. You will be able to easily search issues to link. You can also define the type of relationship such as “is blocked by”, “blocks”, “has to be done after”, “related to”, and more. These are not only labels, but actually function as they are read. So, if you define an issue to be done before or after another specific issue and you try to close an issue wrongly, JIRA will notify you that something goes wrong.

Modifying Multiple (Bulk) Issues

As a manager, modifying multiple issues at once is a life saver. Even something simple as closing issues at once, or re-assigning a bulk of issues to another person or project, these can be done quite easily.

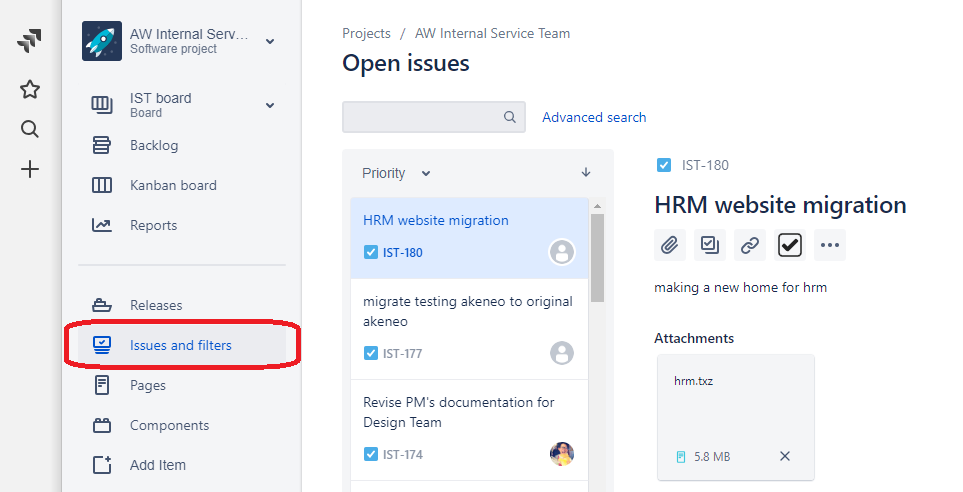
In your project, go to your Issues and filters tab.

You can use the simple search, or click “Advanced search” for better results.

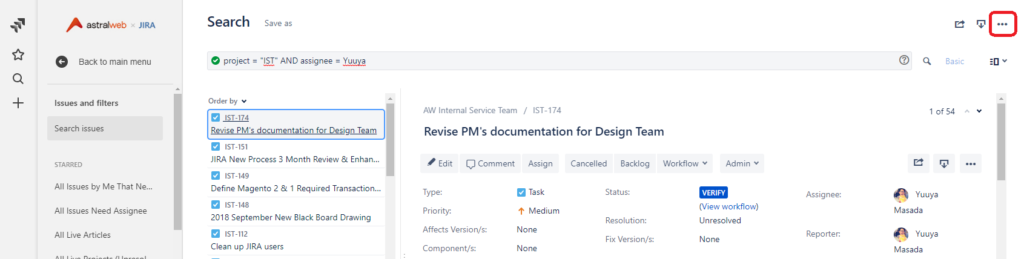
For example, I want to re-assign everything assigned to a specific person to another person. I will use JIRA Query language to filter down the issues to the project and assignee. (Please search JQL for more details on how to query.)

Next, select the “…” menu on the top right.

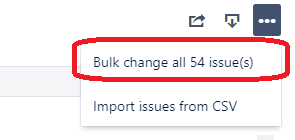
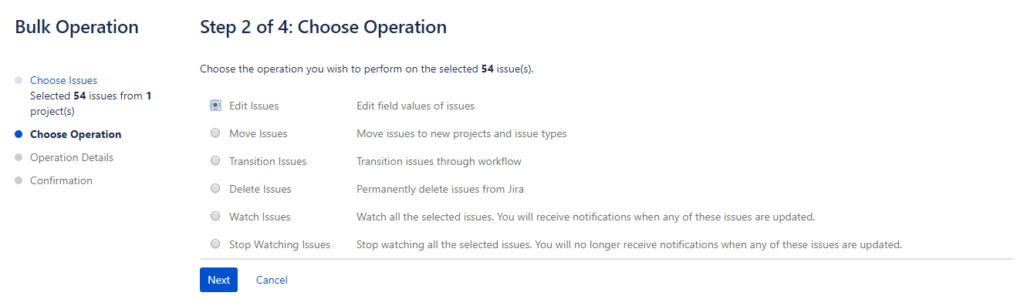
Because the query creates a specific list, you are able to use this list to make bulk changes. So, next, select “Bulk change all ** issues(s)”.

You will be able to further refine your list, or select the top check box to select all. Select “Next” on the bottom of the page.

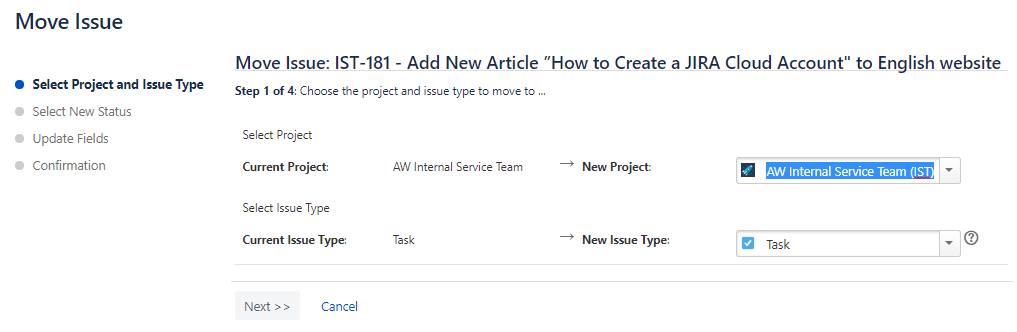
You will be able to edit issues (field values in issues), move issues (from one project to another), transition issues (change status), delete issues (permanently remove from JIRA), watch issues (assign who gets notifications to the issues), or stop watching issues.

Select Edit issues to make issue changes.

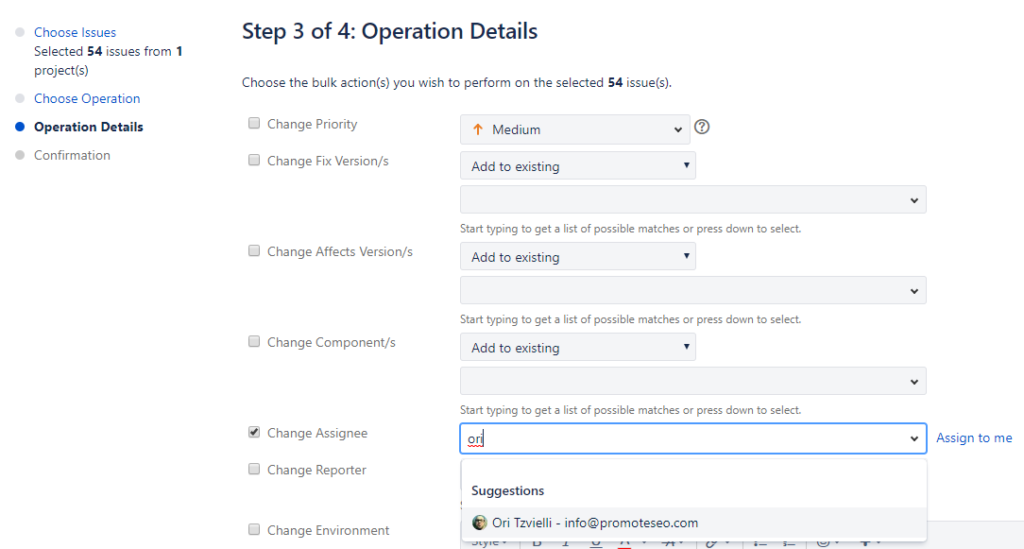
You will be able to change multiple values at once, but here we will re-assign all the issues to someone else. Make sure you select the checkbox and choose the new assignee.

Select “Next” at the bottom of the page to confirm. (You can also choose to get an email log of the operation by selecting the checkbox .)

Once you press confirm, your editing will complete.

Useful Features For General Users

General Users features are the most commonly used features that all team members will need to use, unless you are a guest user that can only view issues.
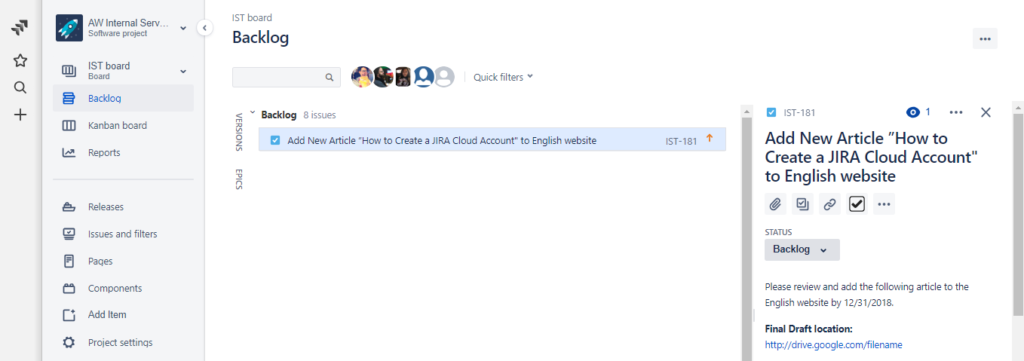
Attaching a File

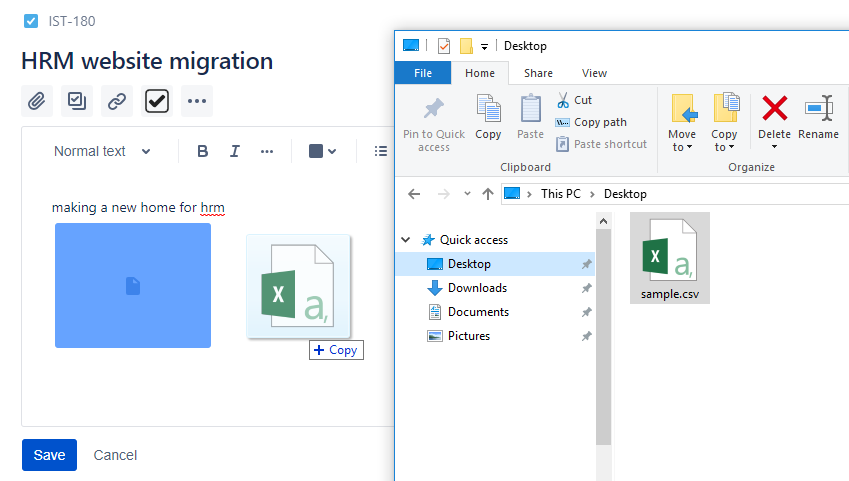
You can attach files by dragging in documents or files directly into the issue description or into comments. They will automatically be listed in the “Attachments” section of the issue.

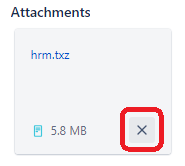
To delete an attachment, selec the “X” icon on a file under the Attachments section.

Attaching a Screenshot

Attaching a screenshot is also easy. This applies to any copied image. After you copy an image or take a screenshot capture, select Ctrl+V to paste the image into the issue description or comment. Your image will be saved automatically as an attachment.
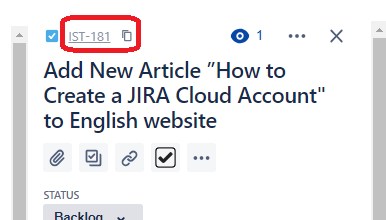
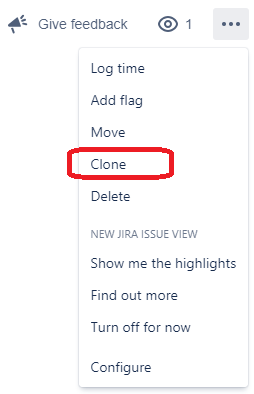
Cloning an Issue

In a case you want to duplicate or clone an issue, you can go to the “…” menu on the top right and select clone. JIRA will create the same issue on a new issue ID number for you.

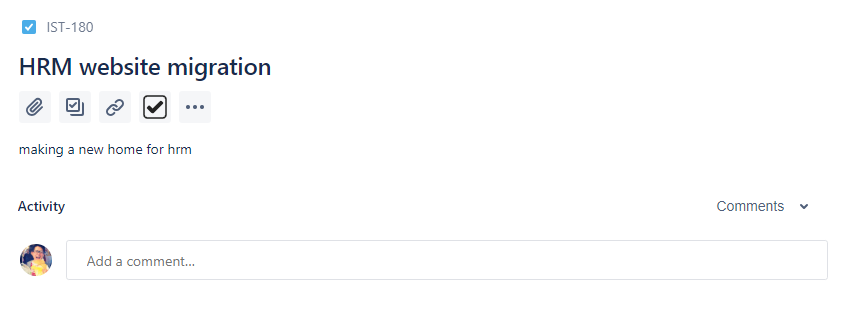
Commenting on an Issue

Any user with the permission can comment on an issue. Go to the bottom Activity section on an issue to add a comment.

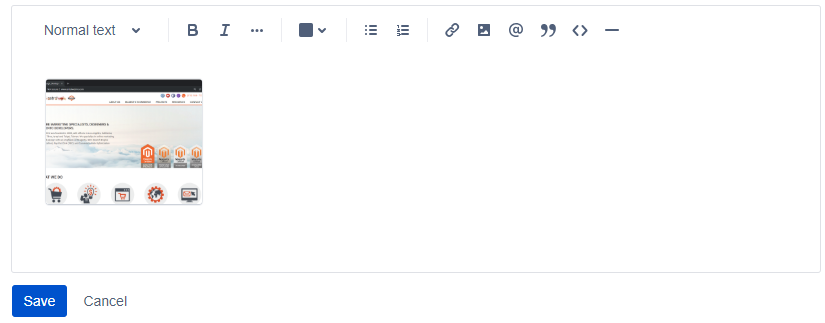
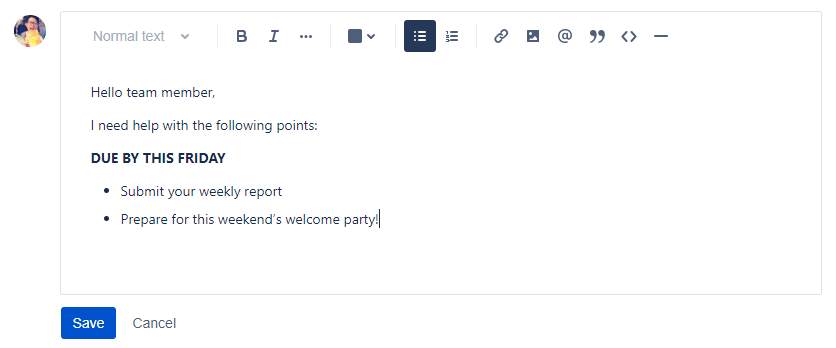
Editing Rich-Text Fields

Comments are one example, but you will be able to style your content in Rich-Text Fields.

You can bold and italicize text, add bullets, images, and even block text in quote or code format.

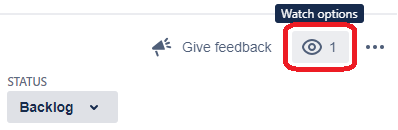
Watching and Voting on an Issue

If you are a reporter or assignee, you will be a watcher and get notifications as how you have set in your admin settings. However, in case you want to watch or have other members to follow an issue, go to the top of the issue and select the “Watch options” icon. You will be able to add users to watch and get notifications.

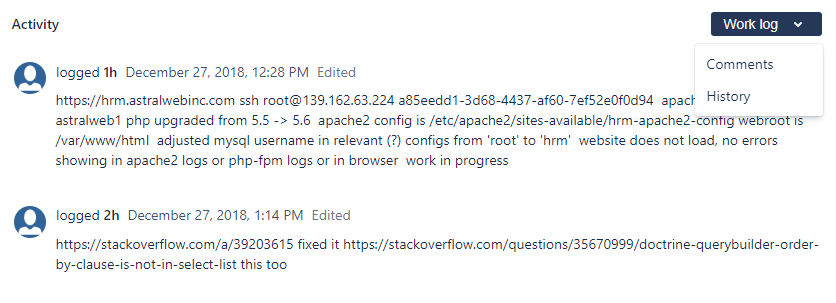
Logging Work on an Issue

Work log is useful for tracking how much time has been spent on a specific issue. In the Activity section, switch the view to Work log to view all work that has been logged to the issue.

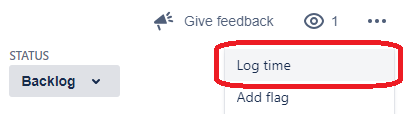
To add a new work log, go to the top of the issue and under “…” menu select “Log Time”.

In the popup you can log the amount of time and the description of the work that has been done. The feature relates to the “Estimate Time” of the task a manager has assigned, so members do not under or over report work done on tasks.

We hope that gives you greater insight on what JIRA issues are capable of! Stay tuned for more in our upcoming articles.

Next: Coming Soon

11 Getting Started with JIRA: Issue Management with Basic Agile Workflow

This article is a part of Astral Web’s Comprehensive Guide to JIRA!

Previously: 10 Getting Started with JIRA: User Interface

What is an Agile Workflow?

An agile workflow is a project management style that takes an iterative approach to development where regular feedback is folded into intervals of work called sprints. This is in contrast to a more traditional waterfall style workflow where development is based on set phases prior to launch (e.g. develop database, then back end, then frontend, etc.).

In an iterative, agile workflow, teams can be diverted to different issues while another part of the project is being resolved. Customers can also review more of the project throughout the development period, instead of waiting until the very end of each phase.

Such workflow has both pros and cons, but in an ever changing web development environment, being agile and flexible is important to stay competitive. At Astral Web, our workflow is hybrid with our internal processes being iterative, but our reporting still shows traditional development phases, such as “Design Phase”, “Development Phase”, and “QA Phase”. We maintain milestones for our clients, but internally we are working with multiple components and schedules simultaneously.

Your JIRA workflows are setup, and your team members are ready to manage tasks. If you haven’t yet, it’s time to create a new project with all your customized settings configured.

Atlassian is continuously updating new JIRA Cloud project features, so please see their latest notes on the options available.

Everything you want to know about next-gen projects in Jira Cloud

https://community.atlassian.com/t5/Next-gen-articles/Everything-you-want-to-know-about-next-gen-projects-in-Jira/ba-p/894773

Otherwise, adding people, setting issues and workflows, and other general settings should be the same. Please go through each tab to check defaults or switch to any custom configurations you have made in the steps before.

For more details on workflows, checkout our previous article: Before You Start Using Atlassian JIRA Part 2: Create A Master Workflow For Your Business

Create an Issue

If your project is set up, you can finally begin to create and assign tasks.

Either start from your project or your dashboard and select the “+” icon on the very left menu bar. If you started from your dashboard, you will need to select the correct Project to create the issue.

Next, select the issue type. Our maser workflow contains multiple types of issues, and each issue has its own custom workflow in alignment with the master workflow. This is because, some issues have higher priority or different steps. For example, if we find a bug, we never want this issue to start from a backlog and sit there until someone moves it forward. We want bugs to be flagged immediately and ready for review by project managers.

We also customized what field should be inputted by the reporter for each type of issue. This helps reporters to complete details without missing anything. A general task would only have a Summary and space to describe the task, but Bugs require more details such as Preconditions, Steps to reproduce, and Expected results.

Editing an Issue

Your new issue should be under the Backlog section, or the location defined as the issue type’s starting point within your workflow.

Backlog issues may not show inside your Kanban board if you did not set up your Kanboard board to display Backlog. Also, you may not have a Backlog tab if you did not set up Backlogs. These can be changed in the Kanban Board settings accessed from the top right “…” option on your Kanban board and go to “Board Settings”.

To edit your issue, you can simply select it to see a mini-view inside your browser. You will be able to change the basic options such as comment, change status, or access your plugins. If you need to change the content of the issue, as long as you are the reporter or admin of the project, you will be able to click any of the fields to make changes.

You can also see the issue on a full page by clicking the issue ID.

You may see this page first, if you have accessed the issue from other methods instead of the backlog section.

Moving an Issue

You can visually move an issue from status to status on your Kanban board.

This is an alternative to selecting your issue status from the issue status dropdown inside your issue details. The mobile JIRA Cloud app, you will only have the select from dropdown option, unless your version supports touch and drag on Kanban boards.

If you need to move an issue to another project, you can do so from the issue details page and select the “…” menu and choose “Move”.

You will go through administrative steps to transfer the data to other projects.

We will cover more of these administrative options in future articles!

Magento Multi Source Inventory Introduction

Magento’s latest version 2.3.0 introduced a much discussed feature, Magento MSI, or Multi Source Inventory. It gives Magento more flexible, more capable inventory management functions that match Magento’s already powerful multi site capabilities.

In a sentence: Inventory is managed across multiple sources that are mapped to sales channels (aka websites) via stocks .

This gives businesses the ability to:

  • Track physical inventory across multiple physical sources
  • Implement more complex multi source (or Omnisource) fulfillment strategies

The New Concepts:

Salable Quantity

Without MSI, Magento has a single QTY value for all simple products. A purchase of a product deducted directly from that number.

MSI introduces a new figure, Salable Quantity, that exists in tandem with QTY. Essentially, it’s an intermediate calculation to ensure that you don’t oversell, while the QTY is maintained across at source level and only updates with shipments or returns.

In order to maintain an accurate salable quantity, reservations made against salable quantities with unfulfilled purchases. In terms of what you see in the admin panel, there isn’t much difference but this is one of the features that allows tracking of salable inventory across multiple channels/websites.

magento multi source inventory diagram

Sources

A core component of MSI, sources represent physical inventory sources. Sources will generally represent warehouses, brick and mortar stores, or drop shippers but can be structured according to individual business structures.

Stocks

Stocks are simply a tool to organize sources into groups according to business flows. Sales channels (websites) are mapped to one or more sources via stocks . Taking a simple example, if we have both a warehouse and a brick and mortar store that are capable of fulfilling US orders, we might assign both of these sources to a stock called “US Ecommerce,” which serves as our stock for our US storefront (website).

How They Add Up

Let’s take a look at the graphic again. Below we have a single warehouse, with a single online sales channel/website. Our source is called “Warehouse” and our stock is called “Bicycle Shop Marketplace.” Salable Quantity at the Stock level is determined by the Quantity at Source level, minus any thresholds we’ve set, minus any pending orders on eBay(note we’ve just grabbed the the magento graphic here – eBay can be considered a website here).

This is essentially the non-MSI magento stock setup, the only exception being that salable quantity is takes two thresholds into its calculation.

magento muli source inventory diagram - one source one stock and one website

Let’s say our sales are growing and we’ve decided to open a new UK brick and mortar store (Flagship store), and two EU websites: UK and Germany (DE).

These two new websites can have orders fulfilled with inventory from both our original warehouse and the new brick and mortar store. This is achieved by assigning these two independent sources to a single stock, “Bicycle Shop UK,” which in turn serves inventory for both of the new websites.

Orders from our eBay storefront continue to be fulfilled only by our warehouse.

magento msi diagram, two sources, two stocks and 3 websites

Continuing to grow, we open up a new US Brick and mortar store, and build a new US website.

Fulfillment for our other websites remains unchanged, but we’ve decided to fulfill orders for our new US website from the two previous sources, as well as our new brick and mortar store.

This is accomplished by creating a stock for the US website which has all three sources assigned to it. This brings us back to the full graphic:

Configuration Overview

*Editors note: we’re starting form scratch and not using the same source, stock and storefront names used in the above diagrams.

Below is a brief look at where MSI shows up in the Magento admin panel:

Sources:

Each installation starts out with a Default source that can’t be disabled. If you’re setting up multiple sources you can rename the default source to better reflect the warehouse or store that it represents.

The only mandatory fields for a source are Name, Code (development use), and Country. Additional fields for unique source contact info and location data that would be utilized for any distance-based source selection algorithm.

Due to the fact that sources are integrally tied to order and shipment histories, they can’t be deleted. However, they can be disabled with the same effect, removing them out from any fulfilment equation.

When setup is completed, your “sources” page should represent all your physical inventory sources as in our sample below (Three US and one Canadian):

Magento MSI manage sources configuration

Stocks

magento MSI stock admin panel navigation

Again, stocks are used for source organization and mapping, so different operation’s stock setup will be unique. In the below example, we’ve set up our “US Ecommerce” stock to represent two of our US sources:

As the object that connects sources to sales channels, both websites and and inventory sources are selected in the Stock view (in this case we’ve added Amazon to represent multi channel operations).

Note that, if multiple sources are assigned to a stock, the admin can drag and drop into a different order. This order is used by the default MSI Source Selection algorithm outlined below.

Source Selection Algorithms:

One of the MSI features with serious potential is support for Source Selection Algorithms which programmatically suggest optimal fulfilment sources for items in an order.

At the time of writing, the only out of the box algorithm in MSI is the “SSA Priority” algorithm for Magento 2.3, but expect updates with new versions soon.

The primary feature of this algorithm is that it prioritizes Sources in the order chosen by the admin on the “Stock” level through a drag and drop list.

In the below screenshot, two sources are assigned to our “US Ecommerce” Stock, and our Seattle Warehouse source will be prioritized by the Priority algorithm due to its position here in the admin.

The full priority algorithm follows this logic:

  1. Checks each source for virtual salable quantity in their assigned order at stock level (top to bottom)
  2. Selects source if a stock level is present (including any aggregate configuration and out of stock thresholds)
  3. Moves down the list to fulfill entire order
    1. E.g. if Seattle source has right socks and New York source has left socks and we’ve sold a configurable product, “Pair of Socks,” 1 simple product will be deducted from each source.
  4. Skips disabled sources assigned to stock.

Custom Source Selection Algorithms

Appealing to multi-channel sellers and larger operations is the potential to customize a source selection algorithm to optimize inventory logistics and shipping costs.

According to Magento:

Magento supports custom development and extensions to add alternative algorithms to prioritize sources. For example, you can have one priority algorithm based upon geography and another based upon expense of stock or a customer attribute. When the cost of stock changes, your implementation can easily change algorithms to ensure the lowest cost.

In other words, you can create the algorithm that’s most appropriate for your operations.

A couple other examples that might be factored into a custom Source Selection algorithm:

  1. Choose source based on cheapest shipping cost
  2. Choose source based on fasted shipping time
  3. Choose source based on national (tax) borders

Again, these more complex algorithms need to be written by third party developers at this point, but the most widely applicable calculations to be incorporated into future Magento releases.

Create In-Page (Anchor) Links in WordPress

The newest versions of WordPress with the Gutenberg editor make inserting anchor links a very straightforward task.

Step 1: Add Link to Section Headers:

The new WordPress interface has a field specifically for adding anchor links to blocks that are using a header tag (H1, H2, H3). Simply click on your header block, open the Advanced dropdown, and give your header a unique link (no spaces or characters).

If you view the html you’ll see that this field inserts an <id> tag to your header that had to be manually added in the classic editor:

<h2 id="first-section-header"><strong>What is Lorem Ipsum</strong></h2>

Step 2: Link Table of Contents to Section Header

For this step, simply use the hyperlink tool to add the unique link you’ve created preceded by a “#” (hash or pound).

Step 3: Repeat As Needed

If you are working with the classic WordPress editor, the only difference is that you’ll need to create the anchor links for each heading directly in the HTML or using an extension.